This is a series of posts about the making of my marketing video for Fin. You can see the other parts of the series by following the links below:
1 | 2 | 3 | 4 | 5 | 6 | 7 | 8 | 9 | 10
This is part four of a series detailing the process I used to make a product marketing video for my app, Fin. The hope is that I can inspire others to try and make these kinds of videos for their own products, as I think they are pretty essential for selling apps to customers.
So far, we’ve gotten our tools and written up a nice script. We now have to make a practical choice before moving forward in beginning to craft the actual video.
To Use Voice or Not to Use Voice?
Once I had my script written, I had an important choice to make. Was I going to read these lines as a voice over script, or print the words onto the screen? Or both?
Personally, I’m a big fan of leaving the majority of my computing devices on mute. I almost never want my computer to make noise. I assume a lot of other people do the same. So even when watching most product videos, I tend to leave the sound off, unless I know the sound is really important to the video. (And if it is, there had better be a good reason.) Couple that with the fact that a portion of my potential audience might have a hearing impairment, and that leads me to think that any product video should still work without the sound. Any music or voice over I consider embellishment only, not essential to get the message across. Besides, putting text on the screen is one of those things that’s super easy to make look professional and snazzy with little to no effort. Why not use a good fraction of my screen time for text?
I decided not to do a voice over reading of the text this time around, and instead only have music for my soundtrack. If you have a good voice (and a good microphone for recording yourself), feel free to talk during your product videos. As long as the message still gets across when the volume is off, you’ll be good either way.
Laying the script into my Final Cut Timeline
The nice thing about having these short lines of text interspersed throughout your video is that they provide a nice pacing mechanism. Some text, a shot of the device, more text, another shot of the device, etc. When you look at it on a Final Cut timeline, it’s very logical and symmetrical.
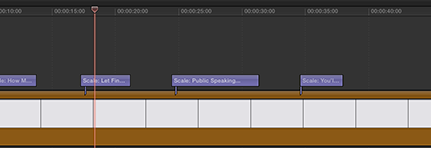
So for this Fin video, I started by simply laying in the text clips with 3-second-ish spaces in between. I chose a standard title effect from Final Cut’s text effects panel, and typed in my lines. Already, without capturing a single screen grab from the simulator, I had a good idea of what the length and the pace of the video would be. Clips would end up being bumped around a bit before it was all said and done, of course, but I was already able to watch through the video and get a feel for the pace. I could time the individual text clips to make sure I could read them fast enough before they disappeared. And I could use my imagination to fill in each video shot of the product, to get a clearer idea of what I’d need when recording those.
This is also a nice way to feel like you got a lot accomplished in a very short period of time. It’s rewarding, and it’s so easy.
In the next part of this series, we’ll start grabbing the actual footage of our app to fill in the spaces between the lines of text.