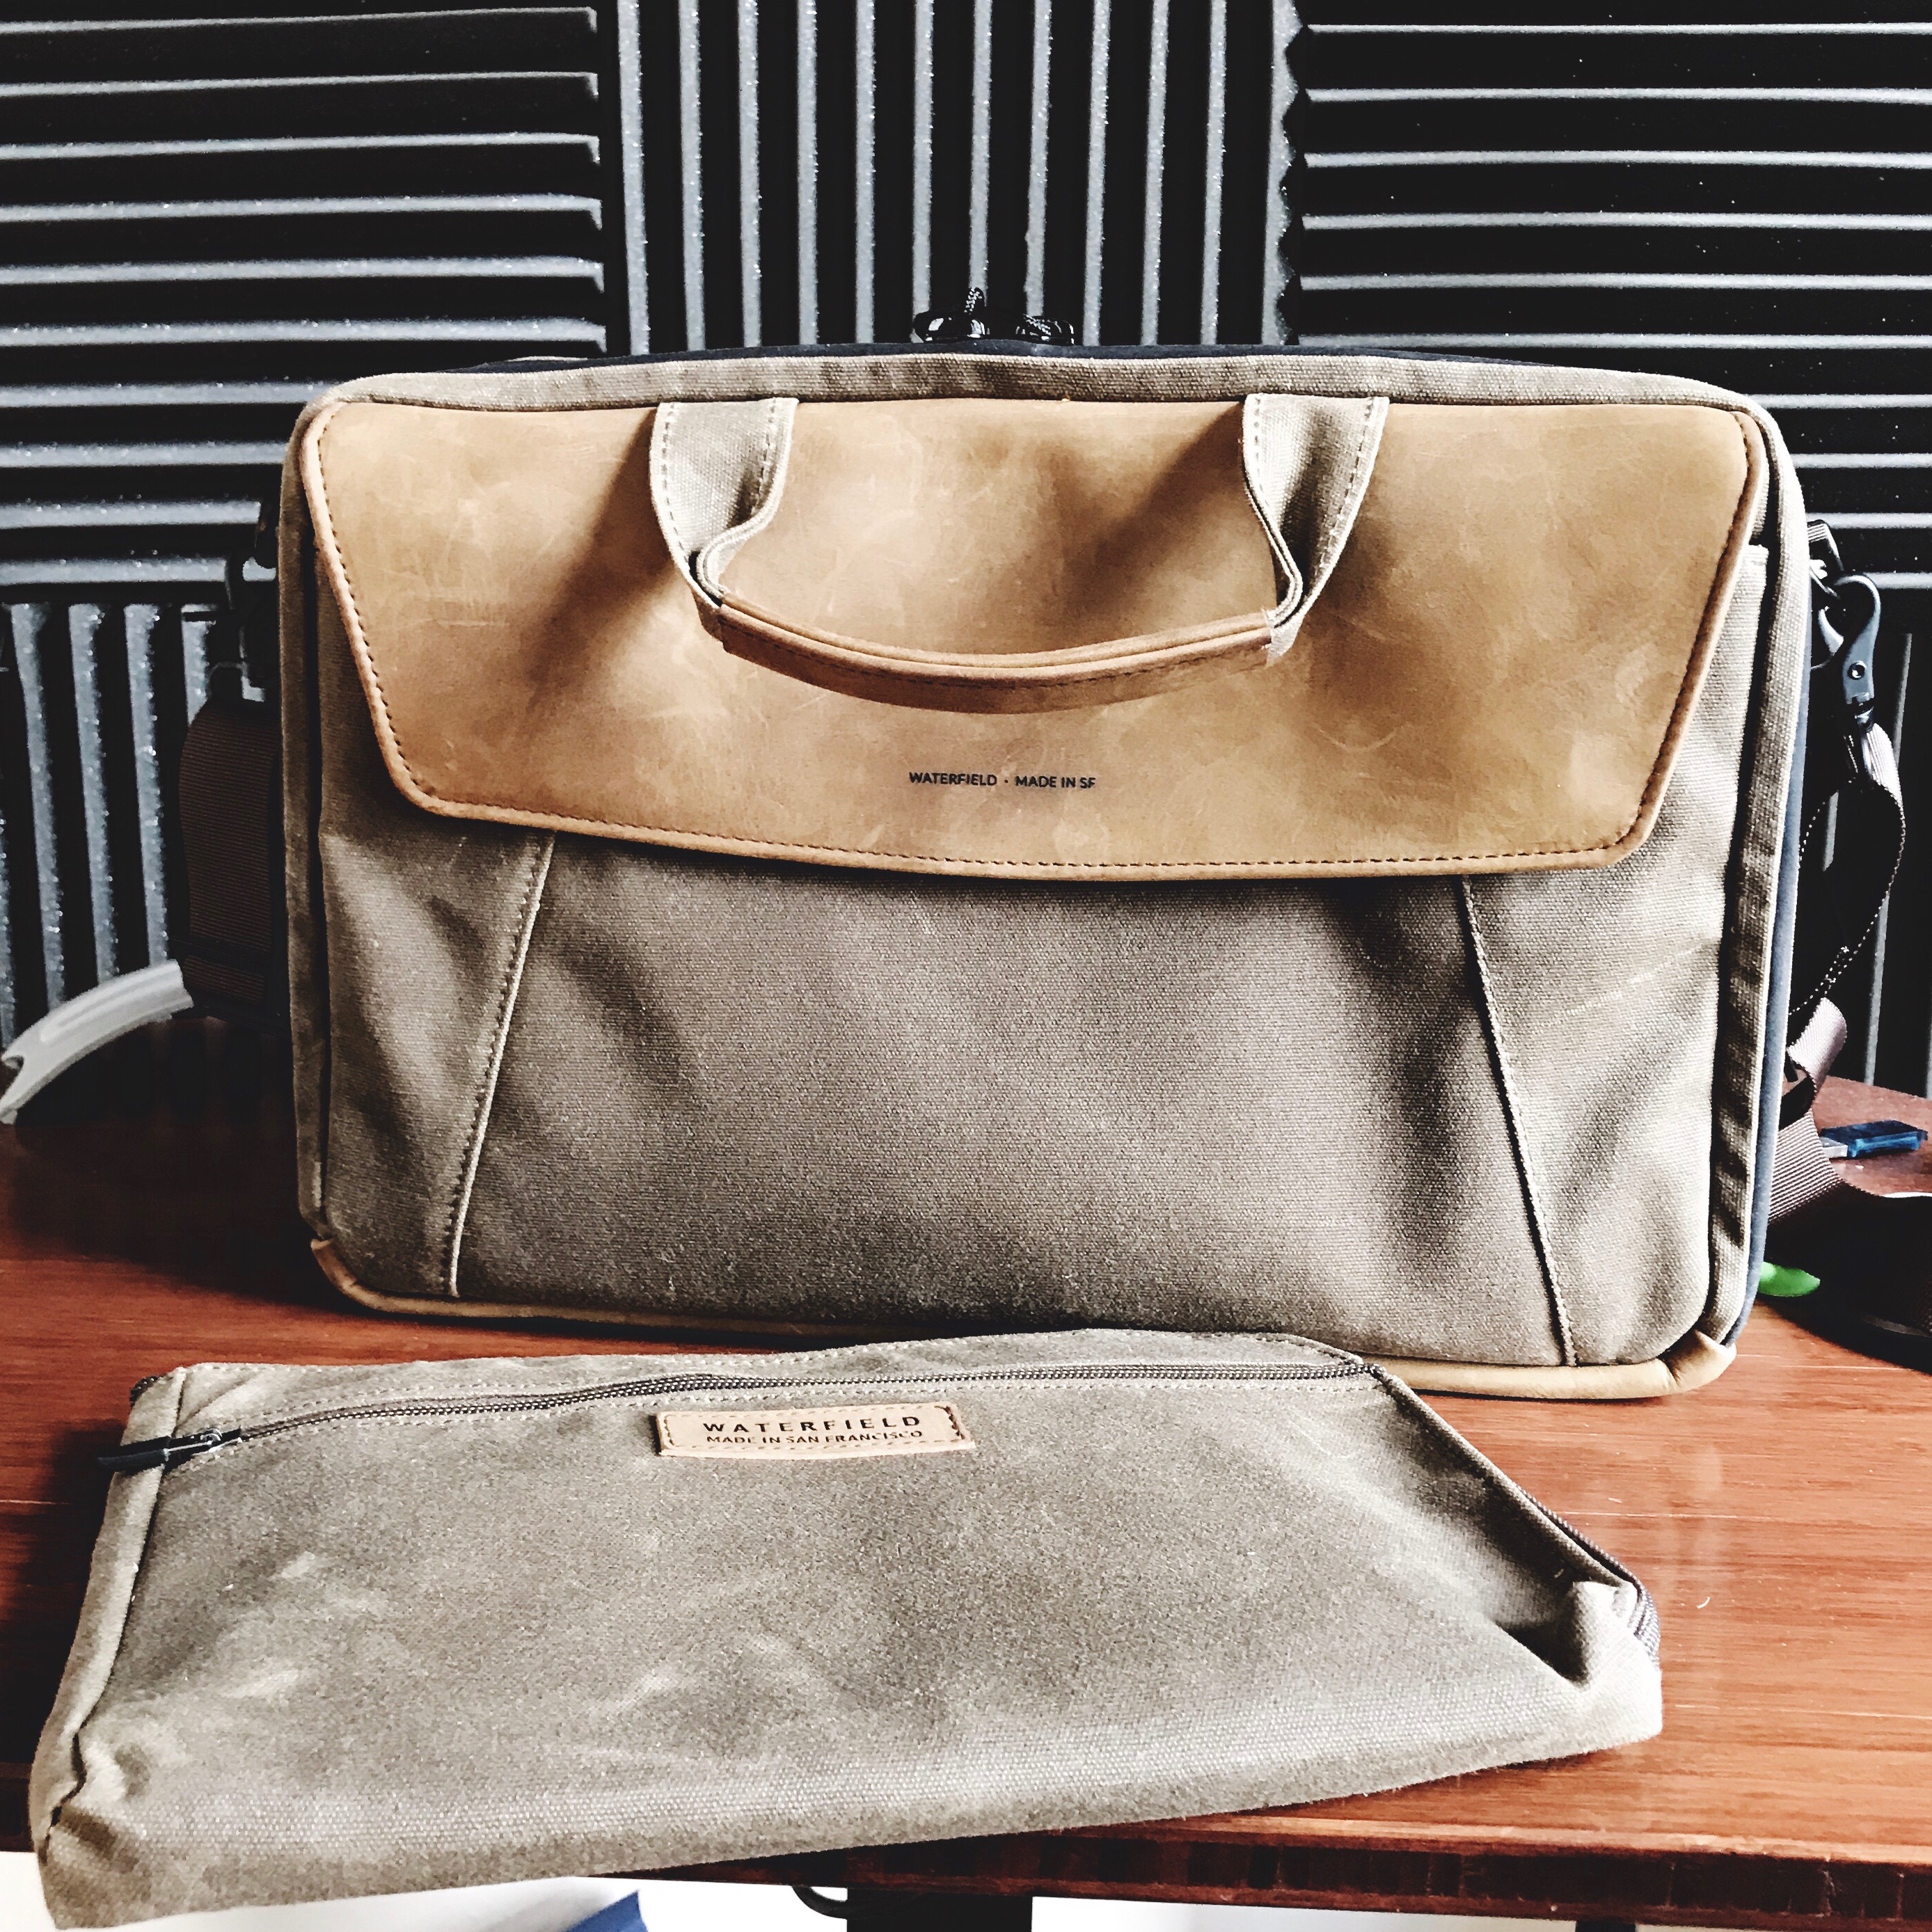
Long-time readers will remember way back in 2010 I reviewed the excellent Waterfield Designs Muzetto bag, which I still use quite regularly. Ever since then, Waterfield has been my first choice for carrying cases and bags. I’m a sucker for handcrafted goods made right here in the States by people earning a living wage.
So when the folks at Waterfield sent out a request to their mailing list this summer to help them design the perfect travel carry-on bag, I couldn’t resist participating. I knew whatever they made in the end would be great, regardless, but just having a small say in some of the various options felt good—and more importantly it provided insight into the company’s design process.
Who doesn’t love to have insight into a company’s design process?
Watching the evolution of this bag over the course of a couple months was enlightening and fun. And I was very impressed with the final product, as it incorporated much of the feedback I had offered.
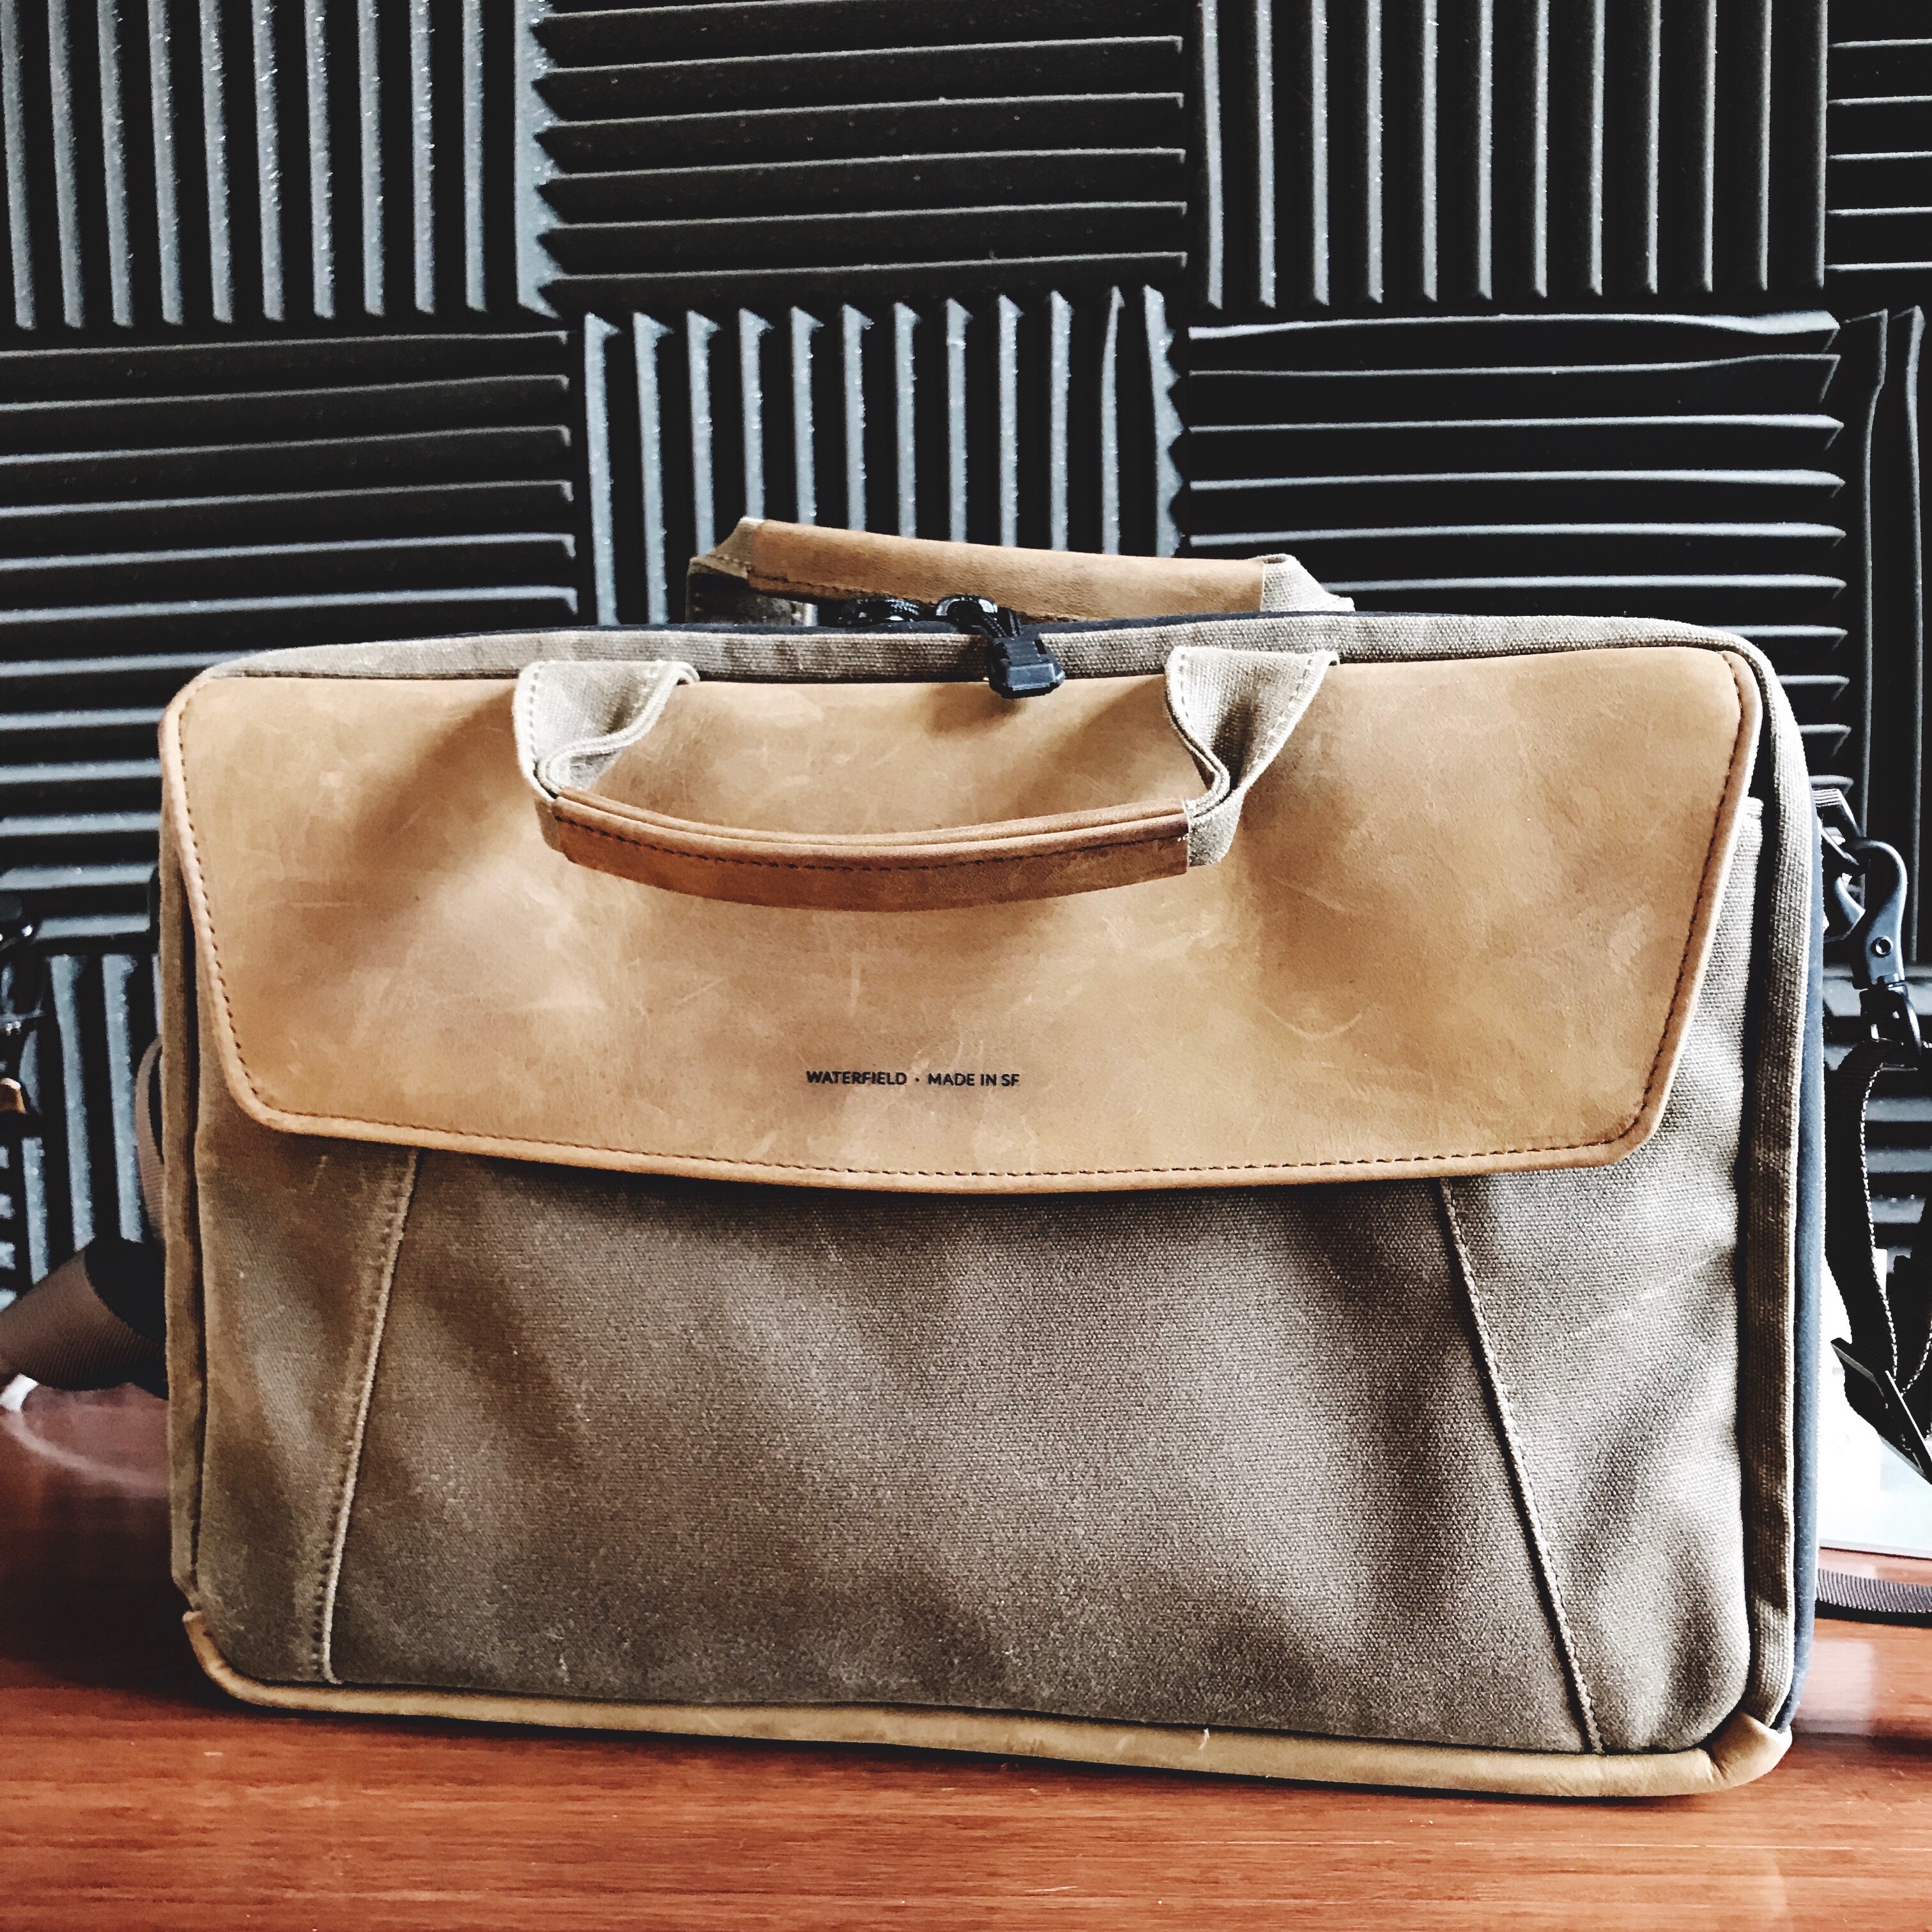
So of course I ordered my new Air Porter shortly after it became available, and it arrived just in time for me to test on my trip to Chicago for Release Notes.
What follows are my impressions of the Air Porter (as the bag was eventually named) with the optional Air Caddy add-on after a few weeks of use.
Product: Waterfield Designs Air Porter, in brown waxed canvas
Extras: Air Caddy, in matching brown waxed canvas
Purchase Price: $379 USD
What is the Air Porter?
First, it’s important to understand the purpose of the Air Porter. As the name implies, this bag is primarily designed to be taken on trips involving airplanes. It makes for a great day-to-day bag, too. But the reason I purchased this bag is that I travel with my laptop and iPad often enough to realize the obvious shortcomings of other types of laptop bags on trips involving flights.
Carrying a laptop bag over my shoulder to the airport isn’t always ideal. With a wheeled carry-on suitcase and often an additional third item—such as one of my various musical instruments—already in my hands, having the extra bag flopping around at my sides isn’t particularly comfortable. Meanwhile, the flat top of a suitcase just begs to hold your laptop case for you, to take that extra weight away from your shoulders. Unfortunately, most messenger bags and briefcases weren’t designed to sit securely upright in this fashion. They don’t hold their shape firm (by design), and they lack an easy way to secure the bag to the wheeled suitcase’s handle. So you end up with a bag that slips and flops off your suitcase as you wheel it around.
Then, when you get to your airplane seat, you put your suitcase in the overhead compartment, and your laptop bag ends up sitting under the seat in front of you. And, just as with the top of the suitcase, the limitations of non-rigid bags quickly become apparent on the floor. The bag doesn’t want to stand upright, and thus you end up with little room for your feet to rest comfortably.
Finally, when you’re on the plane, nine times out of ten, you only need a few items, but they can often be hard to access. For me, I almost always just want my 10.5-inch iPad Pro and my B&O H6 headphones. If I don’t think to grab them before I’m settled in, though, I usually have to pull the entire bag up to my lap to get to those items out.
Air Porter was designed to address all of these issues.
Design
Waterfield never fails to sweat the details on design. The Air Porter is no exception. Waterfield’s usual quality is evident everywhere when I look at this bag. The stitching is clean. The materials are of quality and free from defect. You even get a nice personal note in the box from the people who made your bag. This all adds up to a customer experience that is second to none. And no matter how many times I’ve ordered products from this company, that has never failed to be the case.
Standing vs Lying Flat
The Air Porter has a semi-rigid shape, which allows for quite a bit of capacity, while still allowing the bag to stand on its own upright. It is cut to fit perfectly under the seat in front of you on an airplane, while still leaving enough room for your feet to rest flat. I can’t tell you how big a deal this is to me. At 6 feet, 2 inches, it’s nearly impossible for me to be comfortable in a coach airline seat. I’m used to getting off planes with a fair amount of knee pain, due to contorting my feet into all sorts of odd angles for several hours. Now I don’t have to worry about that at all.
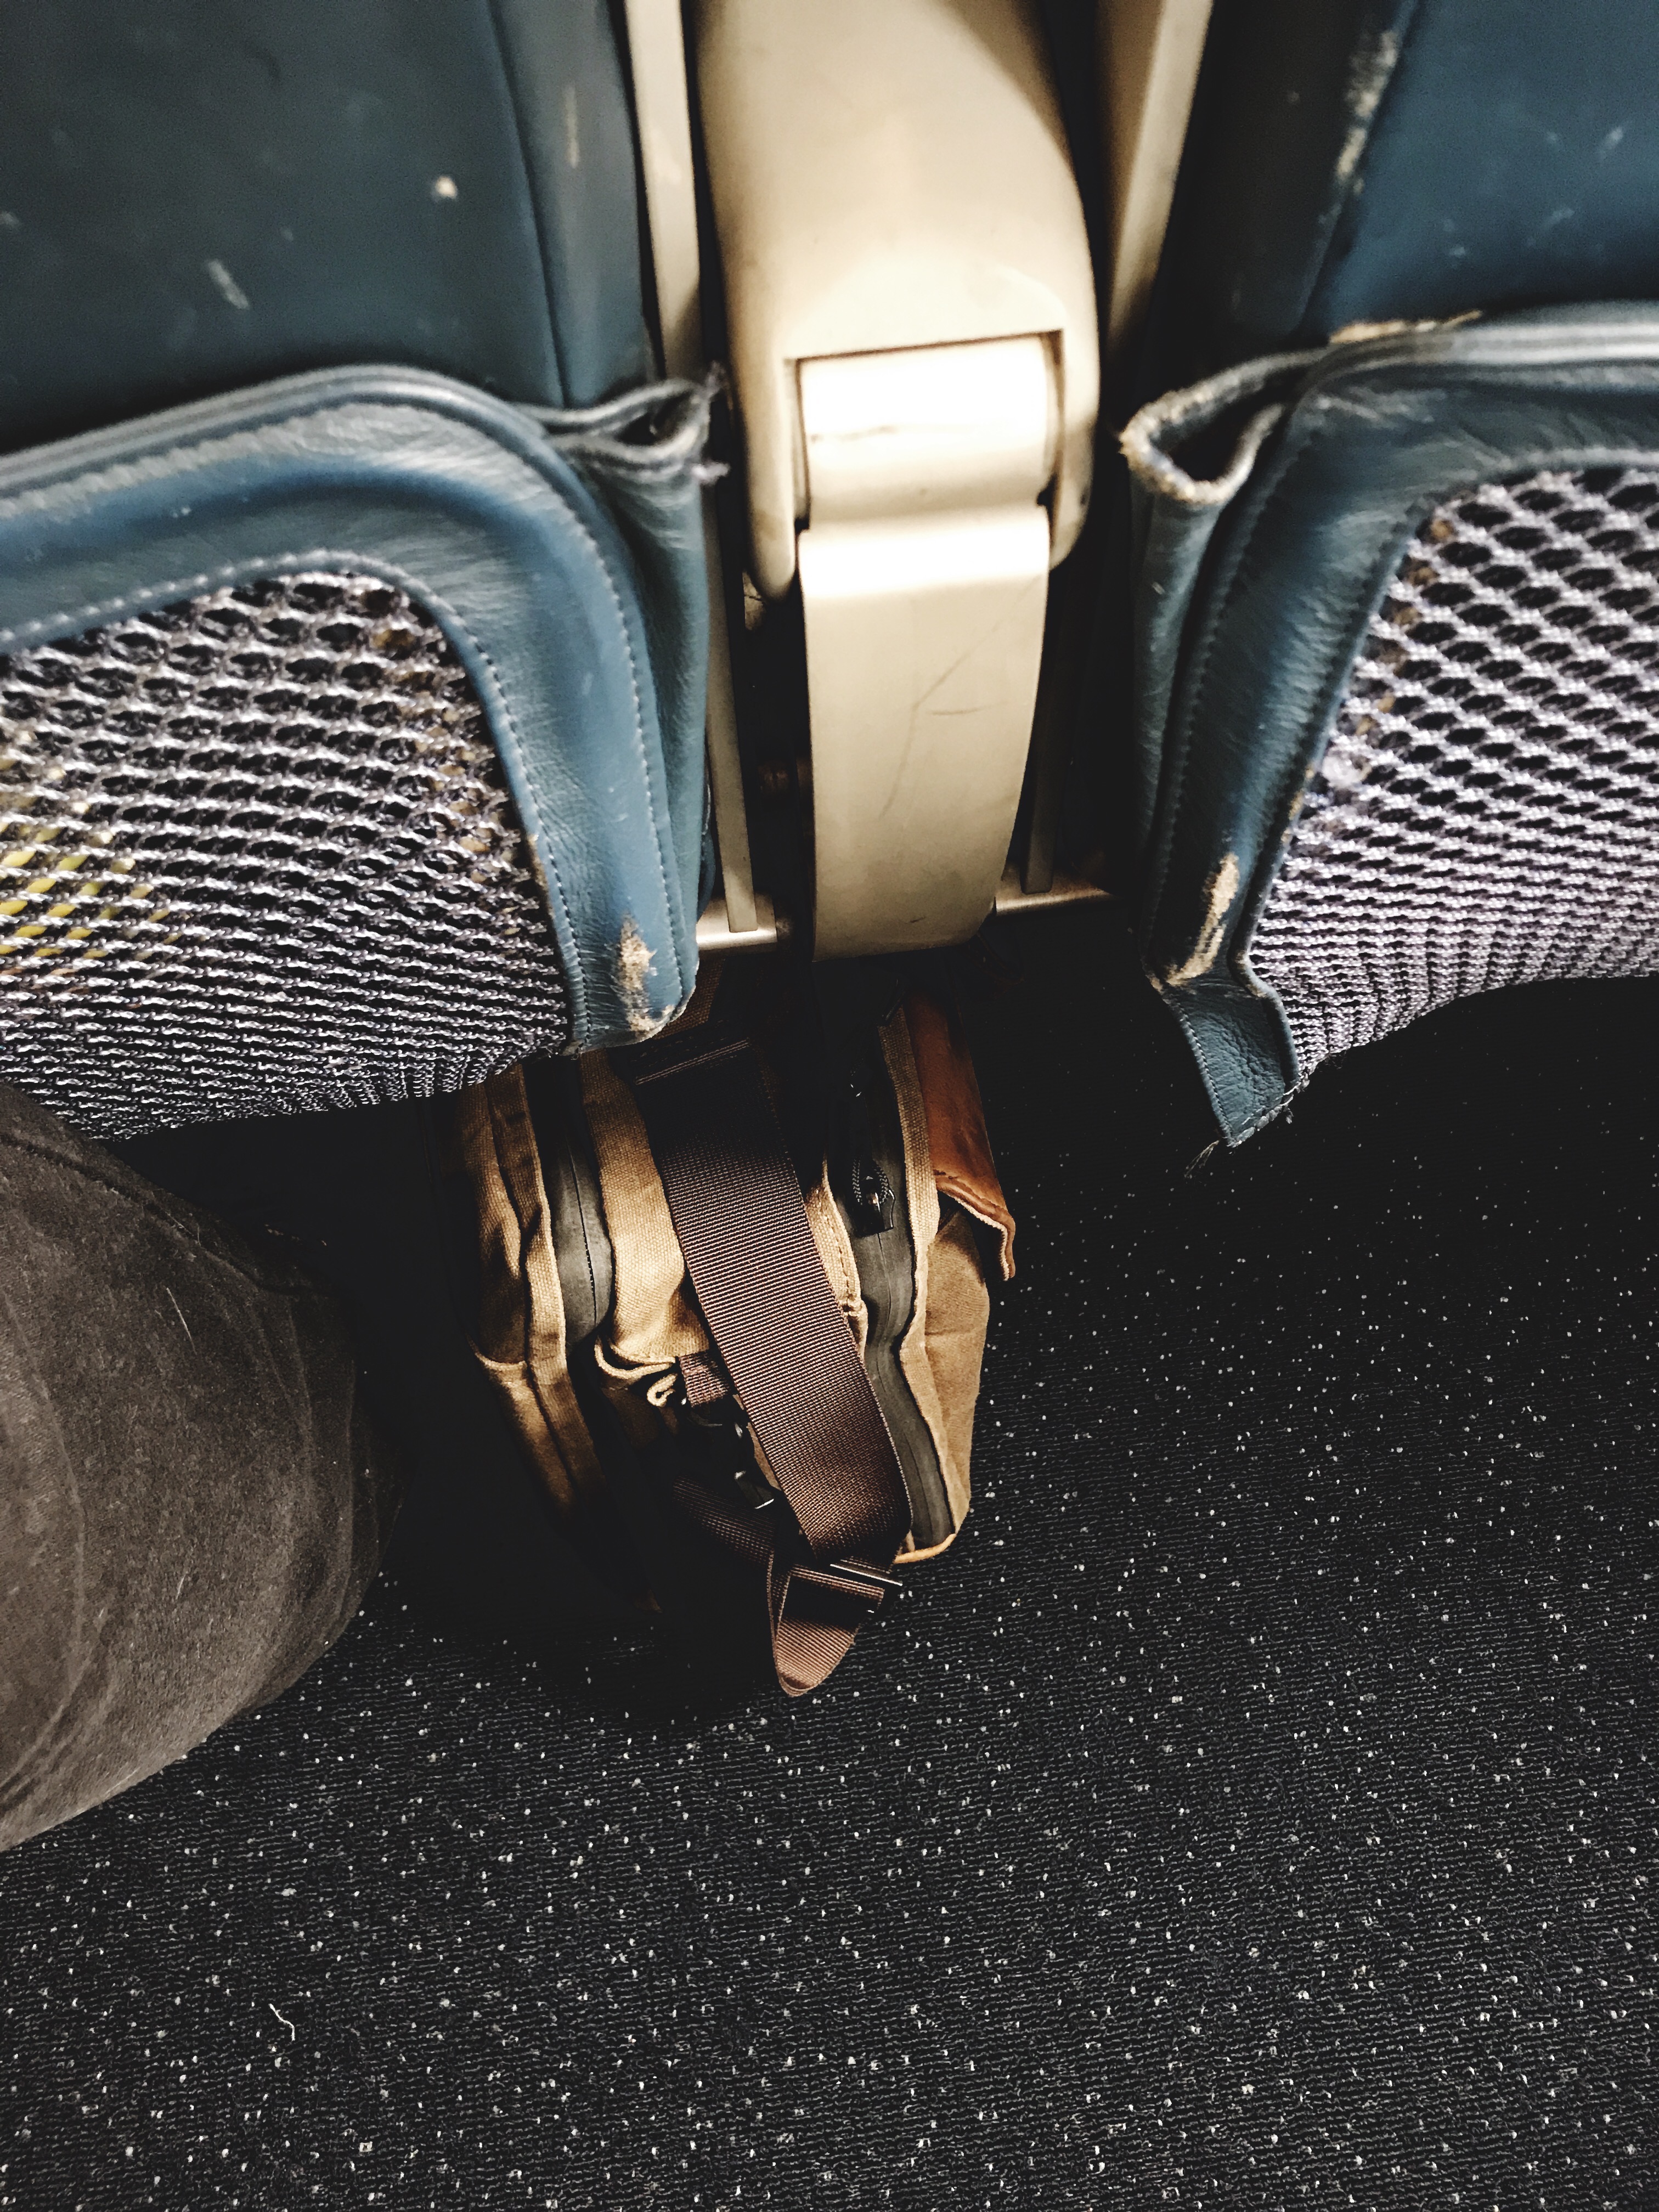
Now, if only Air Porter could stop the person in front of me from reclining…
Because the bag stands up on its own, it’s also ideal for placing on top of my wheeled-suitcase. There’s a strip of canvas across the back of the bag that makes it easy to slip the Air Porter onto a suitcase handle. My suitcase is a Rimowa Salsa Air, which I love, but it features a single-stalk handle in order to save weight and space. That makes it hard for any bag to stay securely placed when leaning on an angle compared to most 2-stalk handle designs. For the most part, though, given the rigid structure of the Air Porter, the bag remained secure and sat comfortably throughout my recent trip to Chicago. Only on a few occasions, when I had pushed the limits of what can reasonably be stuffed into this thing (more on that below) and leaned it at a rather wide angle to get it up a curb, did I end up with the bag sliding out of position off the top of my suitcase. But that’s more the fault of my single-stalk suitcase handle than the Air Porter, I think.
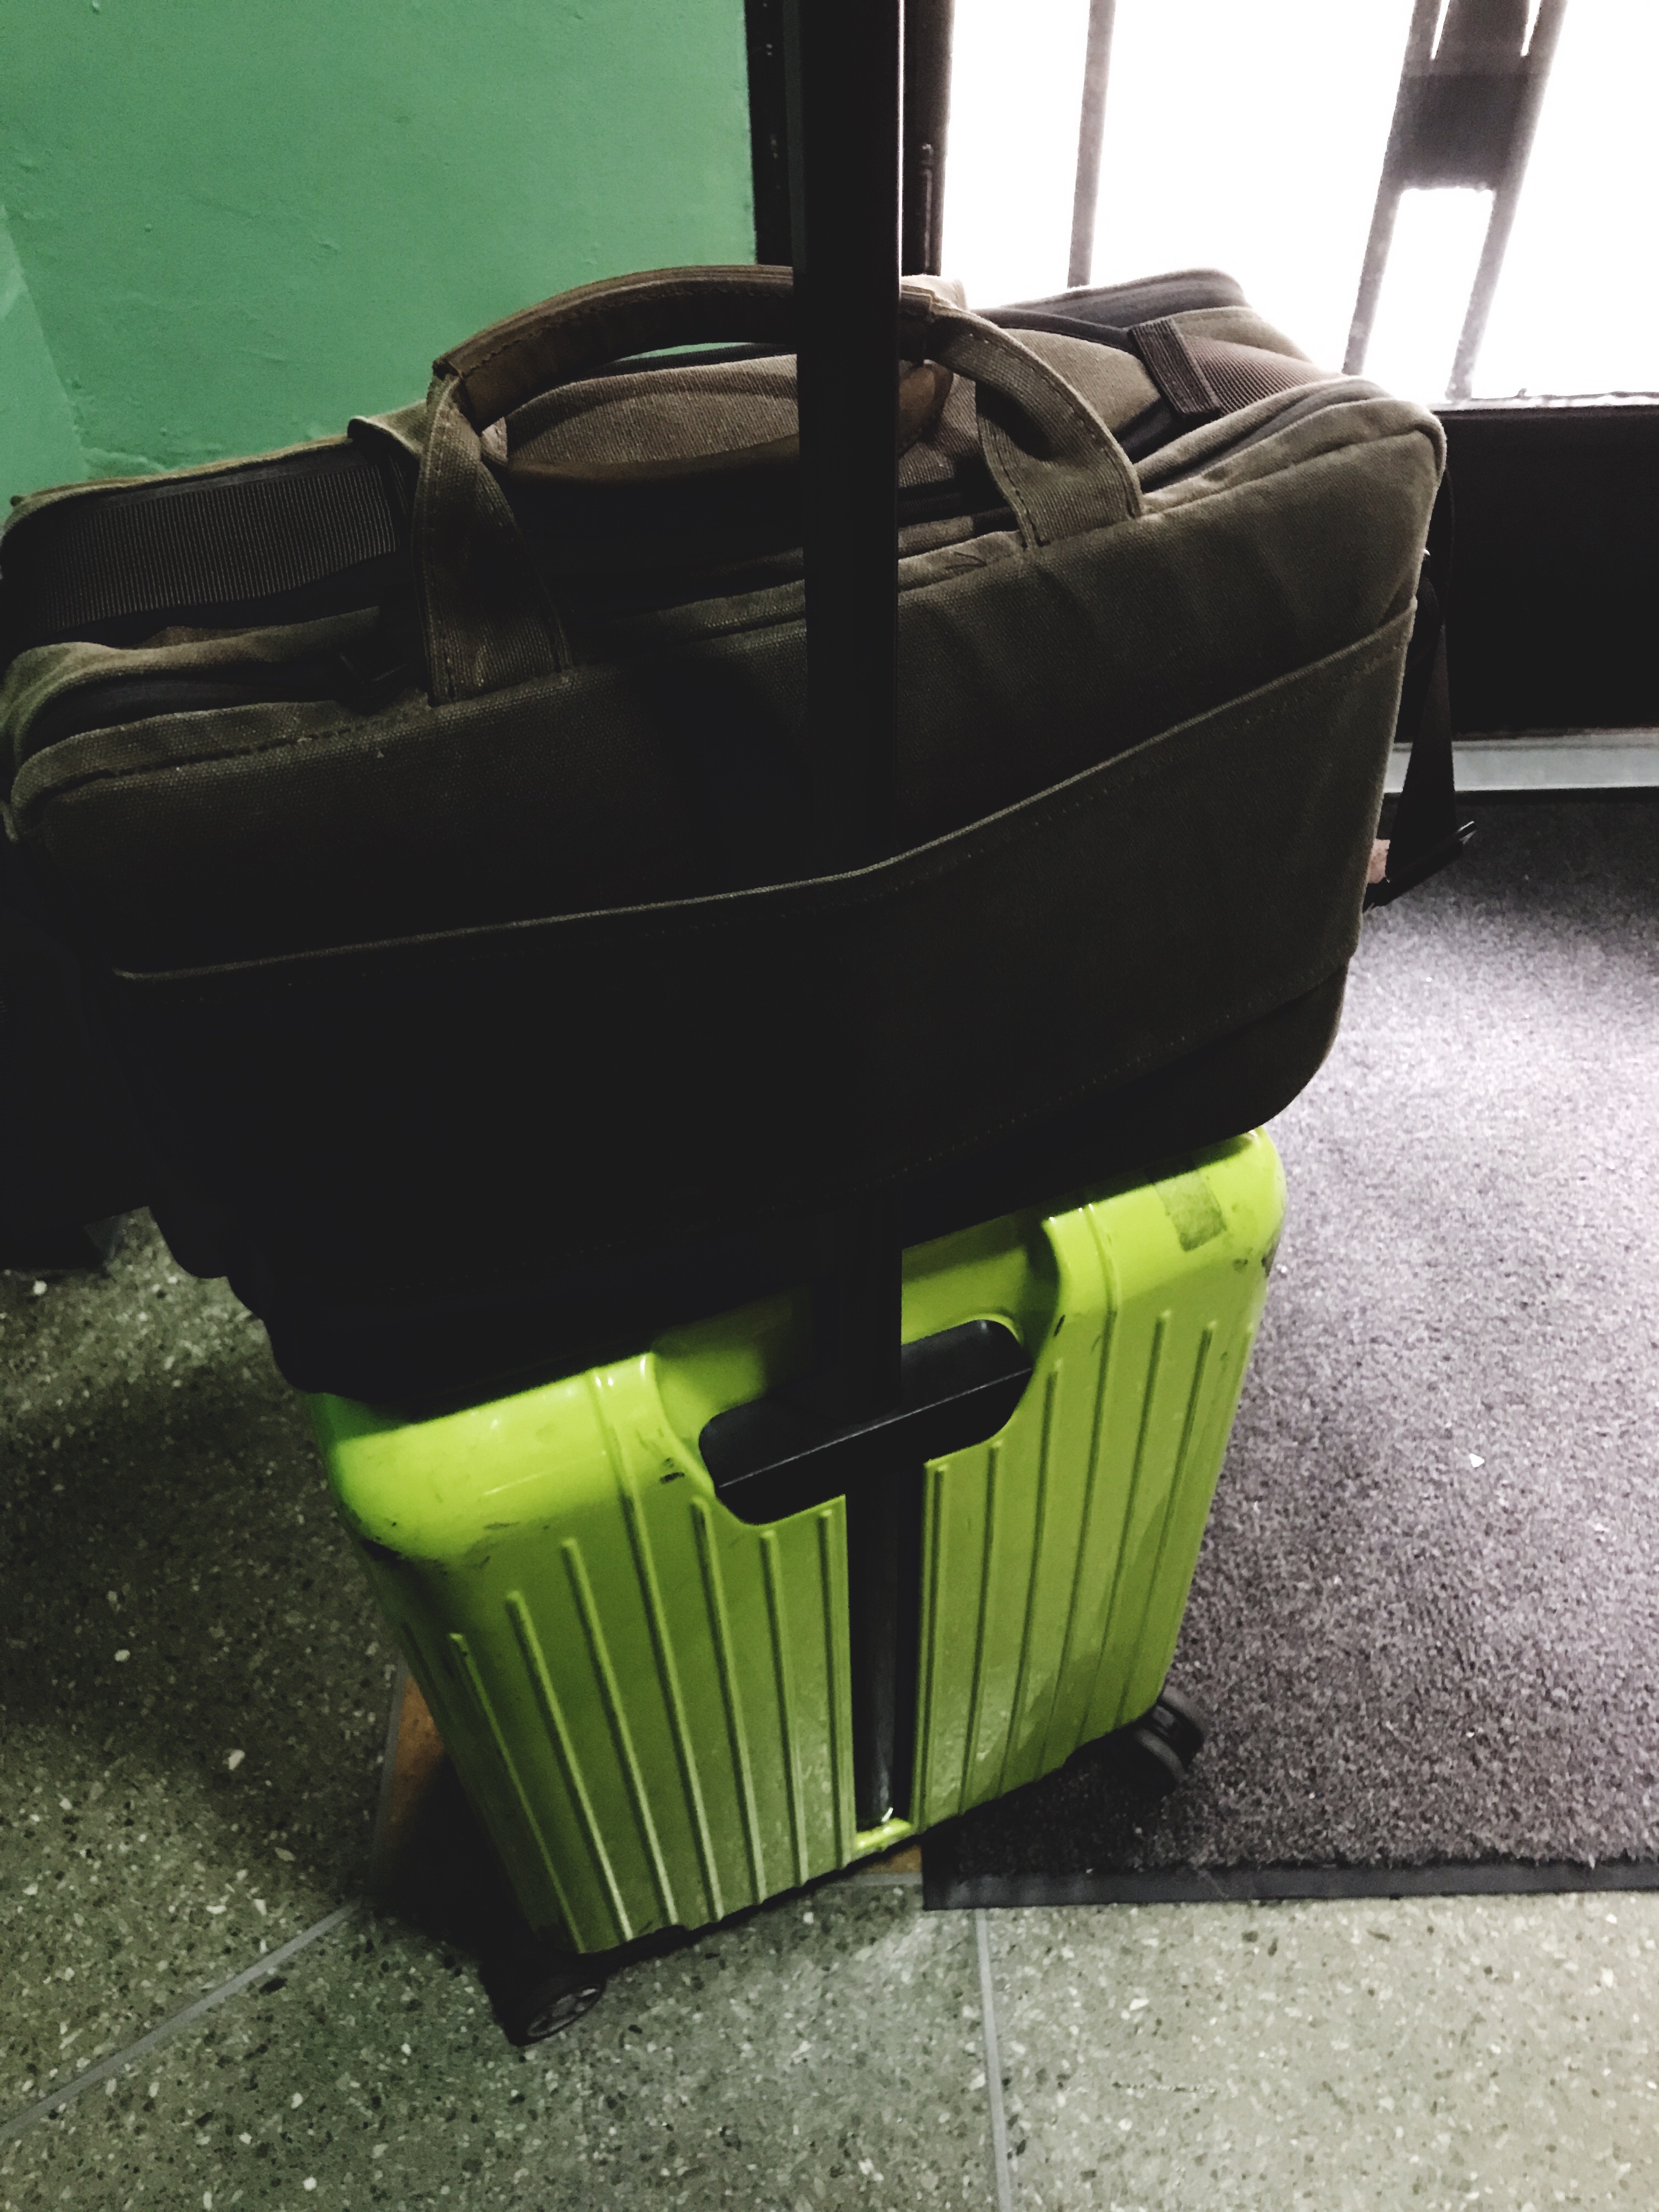
Despite its somewhat rigid shape, the Air Porter is still somewhat flexible, so you can vary the amount of gear you are hauling from day to day. It looks good whether you are carrying a little or a lot.
Carrying
The Air Porter is designed to be carried either by hand via short handles, or with the included shoulder strap. The strap is comfortable, with a padded area for your shoulder. The length can be adjusted quickly with little effort. I find myself alternating between holding the bag on my left shoulder and crossing over my head to my right shoulder quite frequently.
The handles also come in handier than I would have expected. With comfortable leather trim, the handles make it easy to lift the Air Porter from the ground or from a table, or to carry the bag briefcase style.

Laptop Compartment
I have TSA Precheck, so I seldom have to worry about taking my laptop out of my bag anymore at the airport. For the occasional international flight, or when the TSA decides on a whim that it wants to revoke my usual Precheck privileges, however, it’s nice to know that the laptop compartment of the Air Porter can be fully zipped open to lie flat. This means the laptop will sit alone for the scanner to see without having to remove it from the bag entirely. This is an incredible convenience, especially for someone like me, who hates fumbling to put things back into my bags, thus holding up the line.
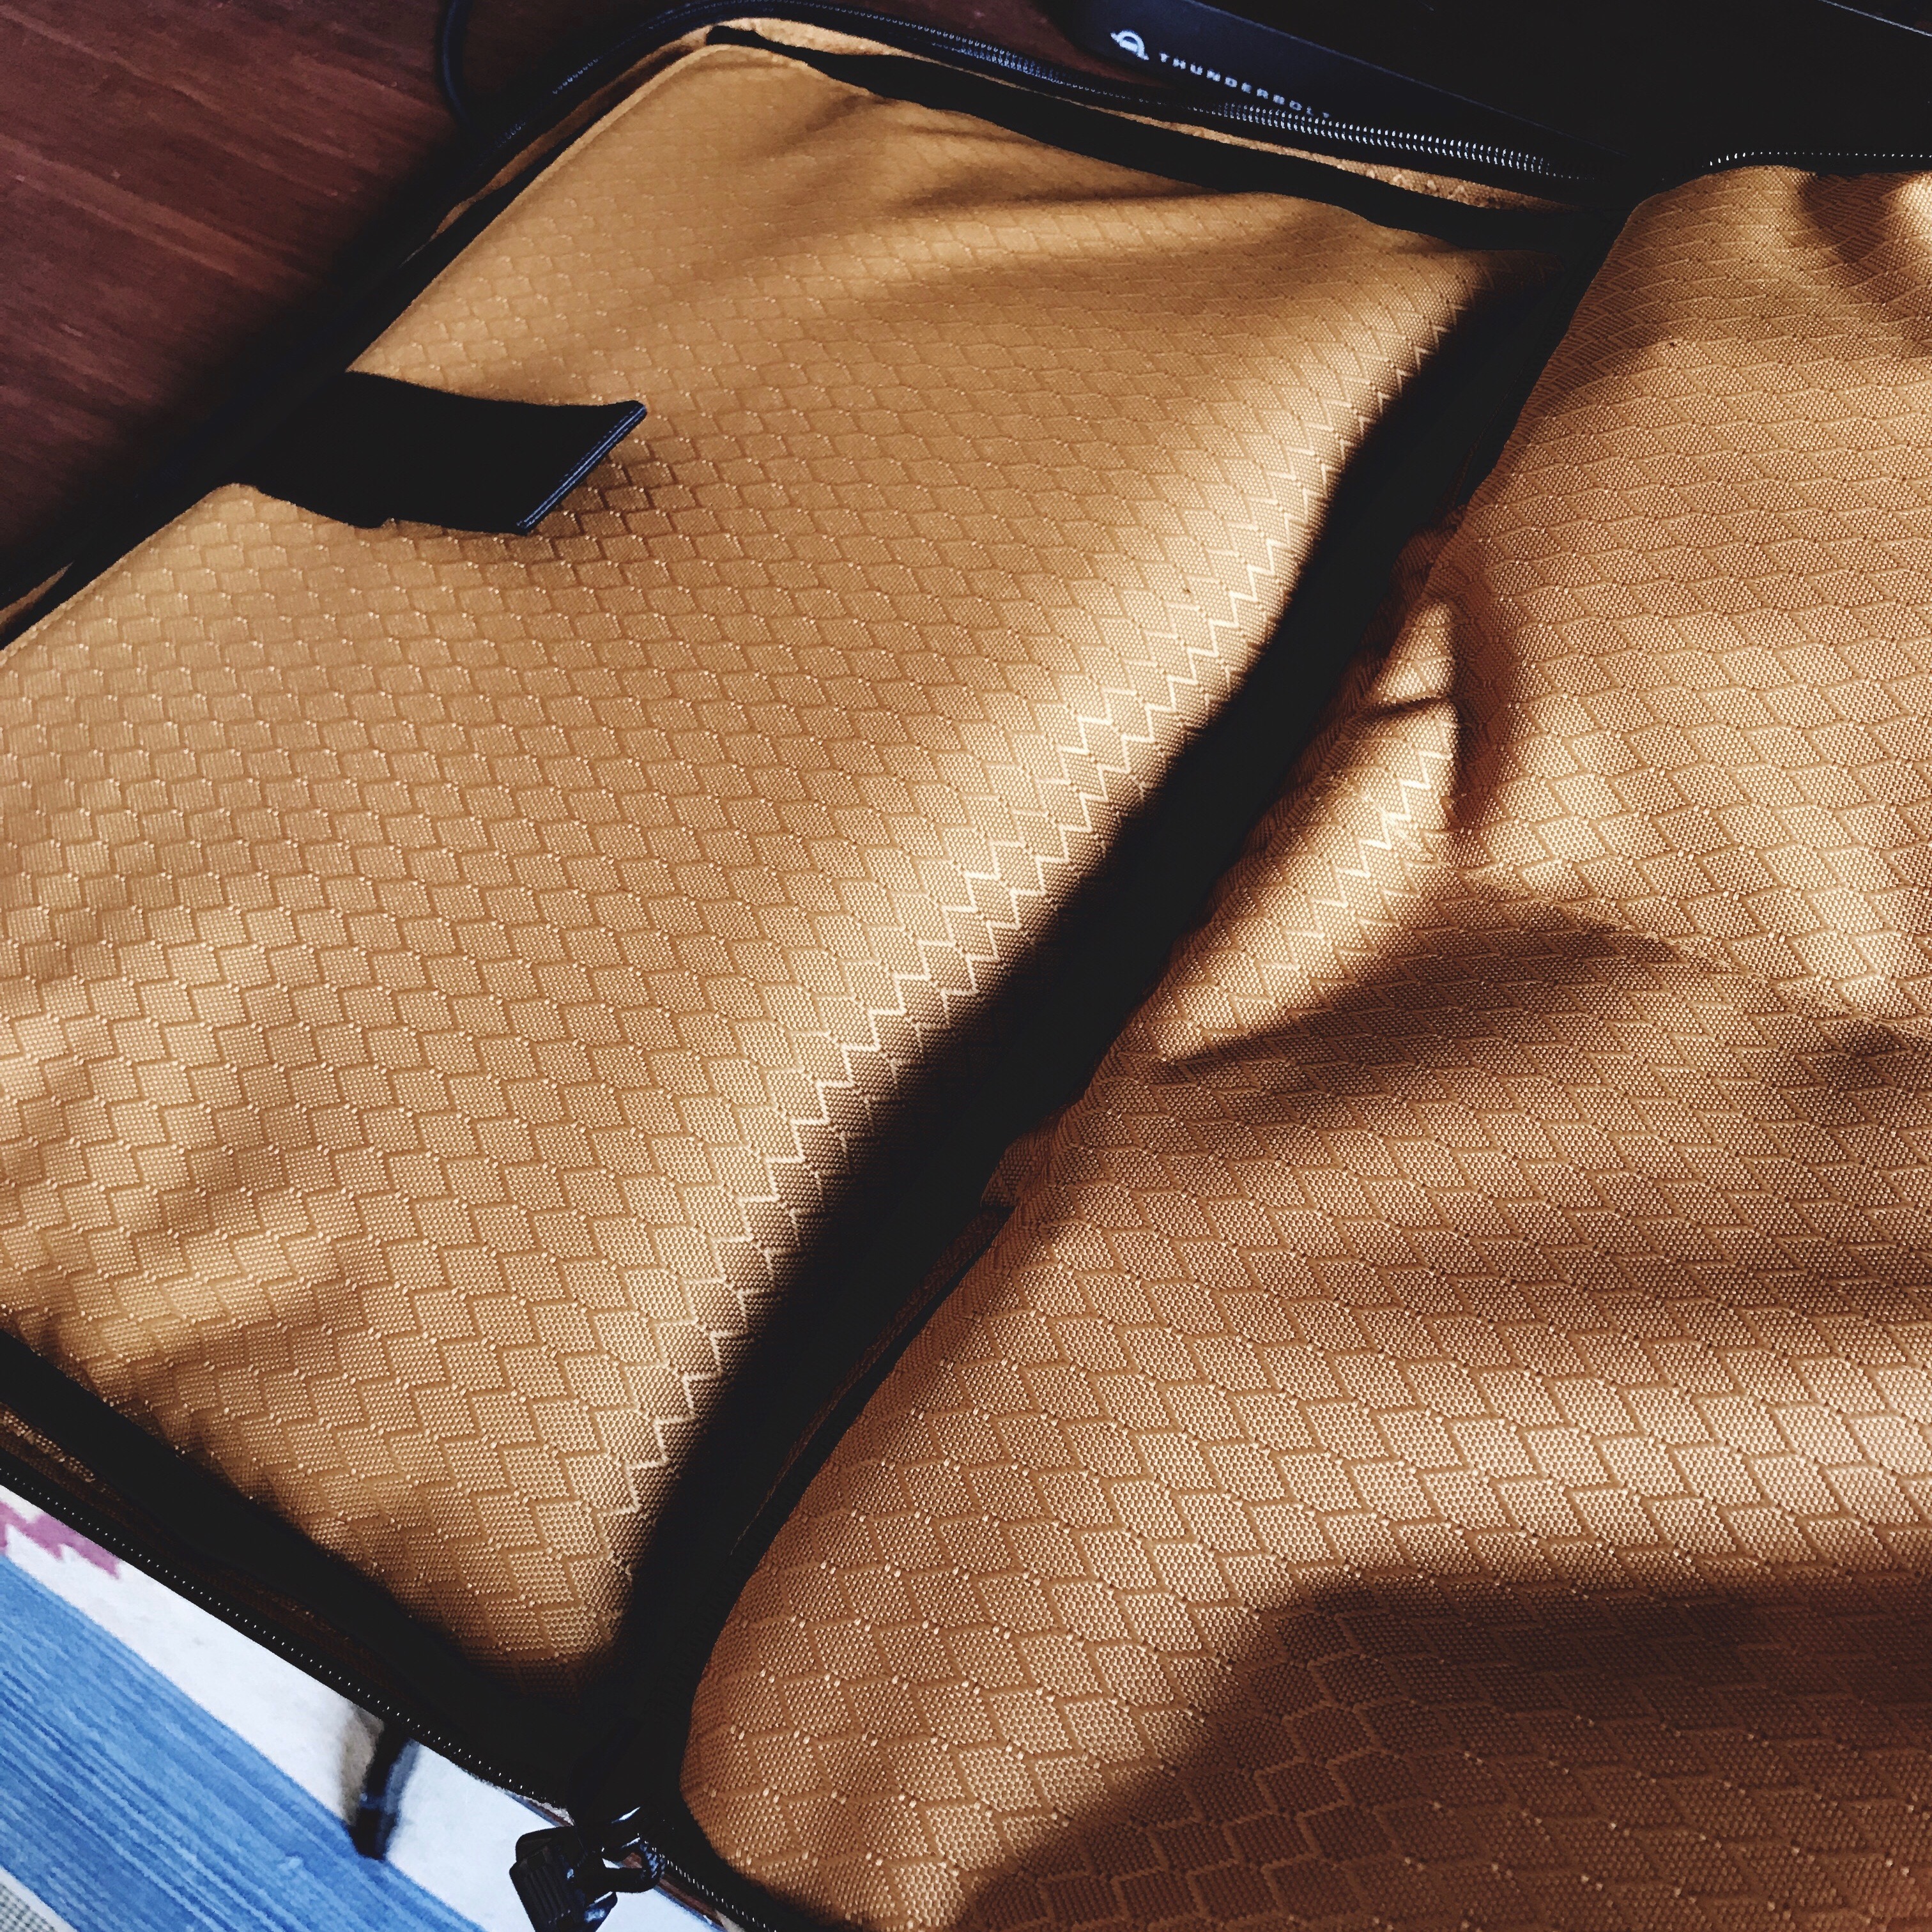
The Air Porter features a built in padded sleeve for a laptop, so there’s no need to sheath your machine in extra padding prior to placing it into the bag. The sleeve fits either a 15-inch or 13-inch MacBook Pro comfortably.
I was worried my 13-inch Pro would be swimming around in the compartment, and I was a bit disappointed at first when I saw that there wasn’t a slightly smaller-sized version of the Air Porter designed specifically for 13-inch machines. In practice, though, I can see that a slightly smaller size would not make much difference. It may even make the bag too small to fit my 10.5-inch iPad inside the Air Caddy in the front pocket. And the purpose of a bag like this is to allow for some extra gear during longer trips, so I don’t think I’d necessarily want to trade the slightly tighter laptop fit for less capacity overall. I think Waterfield made the right compromise here.
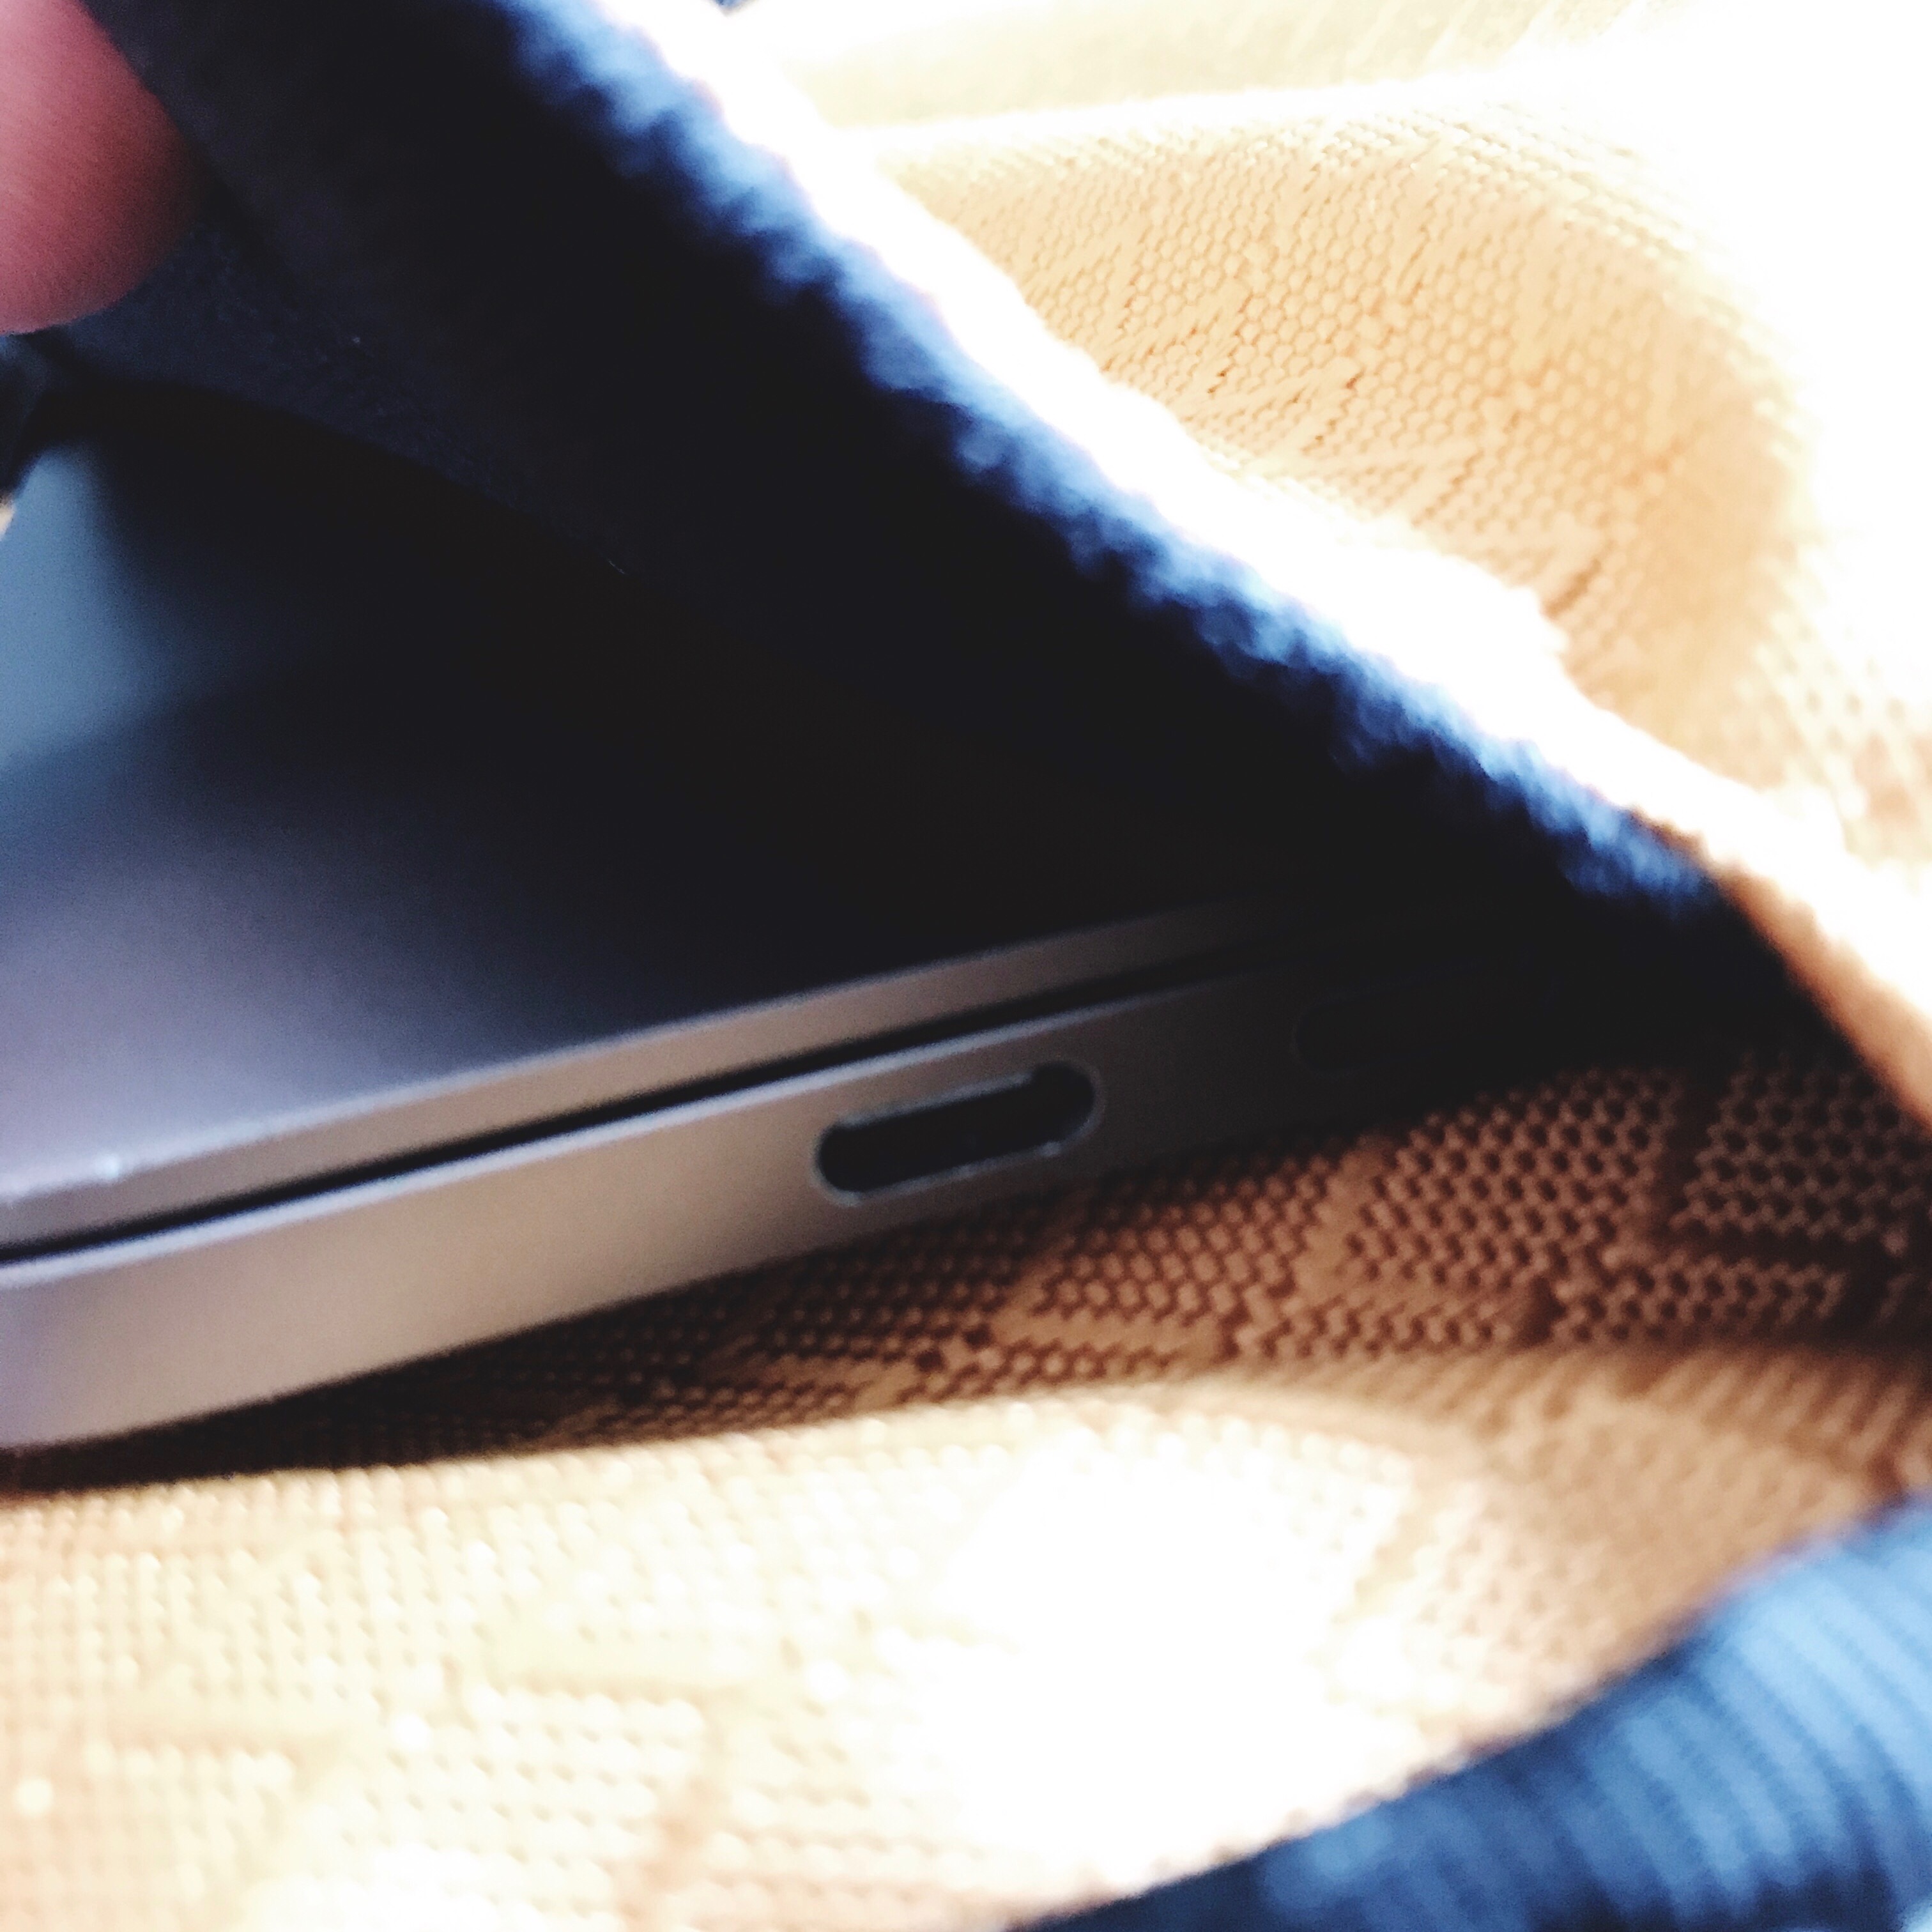
There are cutouts on either side of the padded laptop compartment, to allow you to plug in your power cable while the laptop is still inside the bag. A nice feature for those who may want to grab a few extra minutes of charge while sitting around the airport during a layover. The cutouts are low enough even for the 13-inch to access at least the rear ports on either side.
There are also two pockets on the opposite side of the laptop compartment. These are perfect for your charger, some cables or adapters, or even a backup hard drive.
The Front Flap
The large leather front flap is probably my favorite design feature of the Air Porter. It’s attached via magnets, so it stays secure while still being very easy to open when needed. There is an extra set of magnets as well, slightly higher up, to allow the flap to “expand” and still remain secure if you have more things stuffed inside than usual.
Inside that front flap is where the Air Caddy lives. This makes it very easy and convenient to simply pull the Air Porter out a few inches from under the seat in front of you on the airplane, lift the flap, grab the Air Caddy, then let the flap drop and push the Air Porter back into its position under the seat. Access to my iPad has never been easier from an airplane seat.
You can put other things inside the pocket under the front flap, of course, instead of the Air Caddy. If you don’t have an iPad, or you just want to have easy access to other things while flying, you’ll be happy to know Waterfield does sell the Air Porter without the Air Caddy. But I find my iPad is the first thing I always grab when I fly. So the Air Caddy was a no-brainer for me.
Also under the flap is a quick access zippered pocket. This comes in handy for a passport, a wallet, paper boarding passes—basically anything you want to get to quickly while on the go. It’s easier to access than any other pocket in the Air Porter.
Air Caddy
The Air Caddy almost deserves its own review. It can be purchased separately, after all. And it does make for a nice iPad case on its own, or even as some extra padding while riding inside a Muzetto, which is how I use it for casual walks around the neighborhood without my laptop.
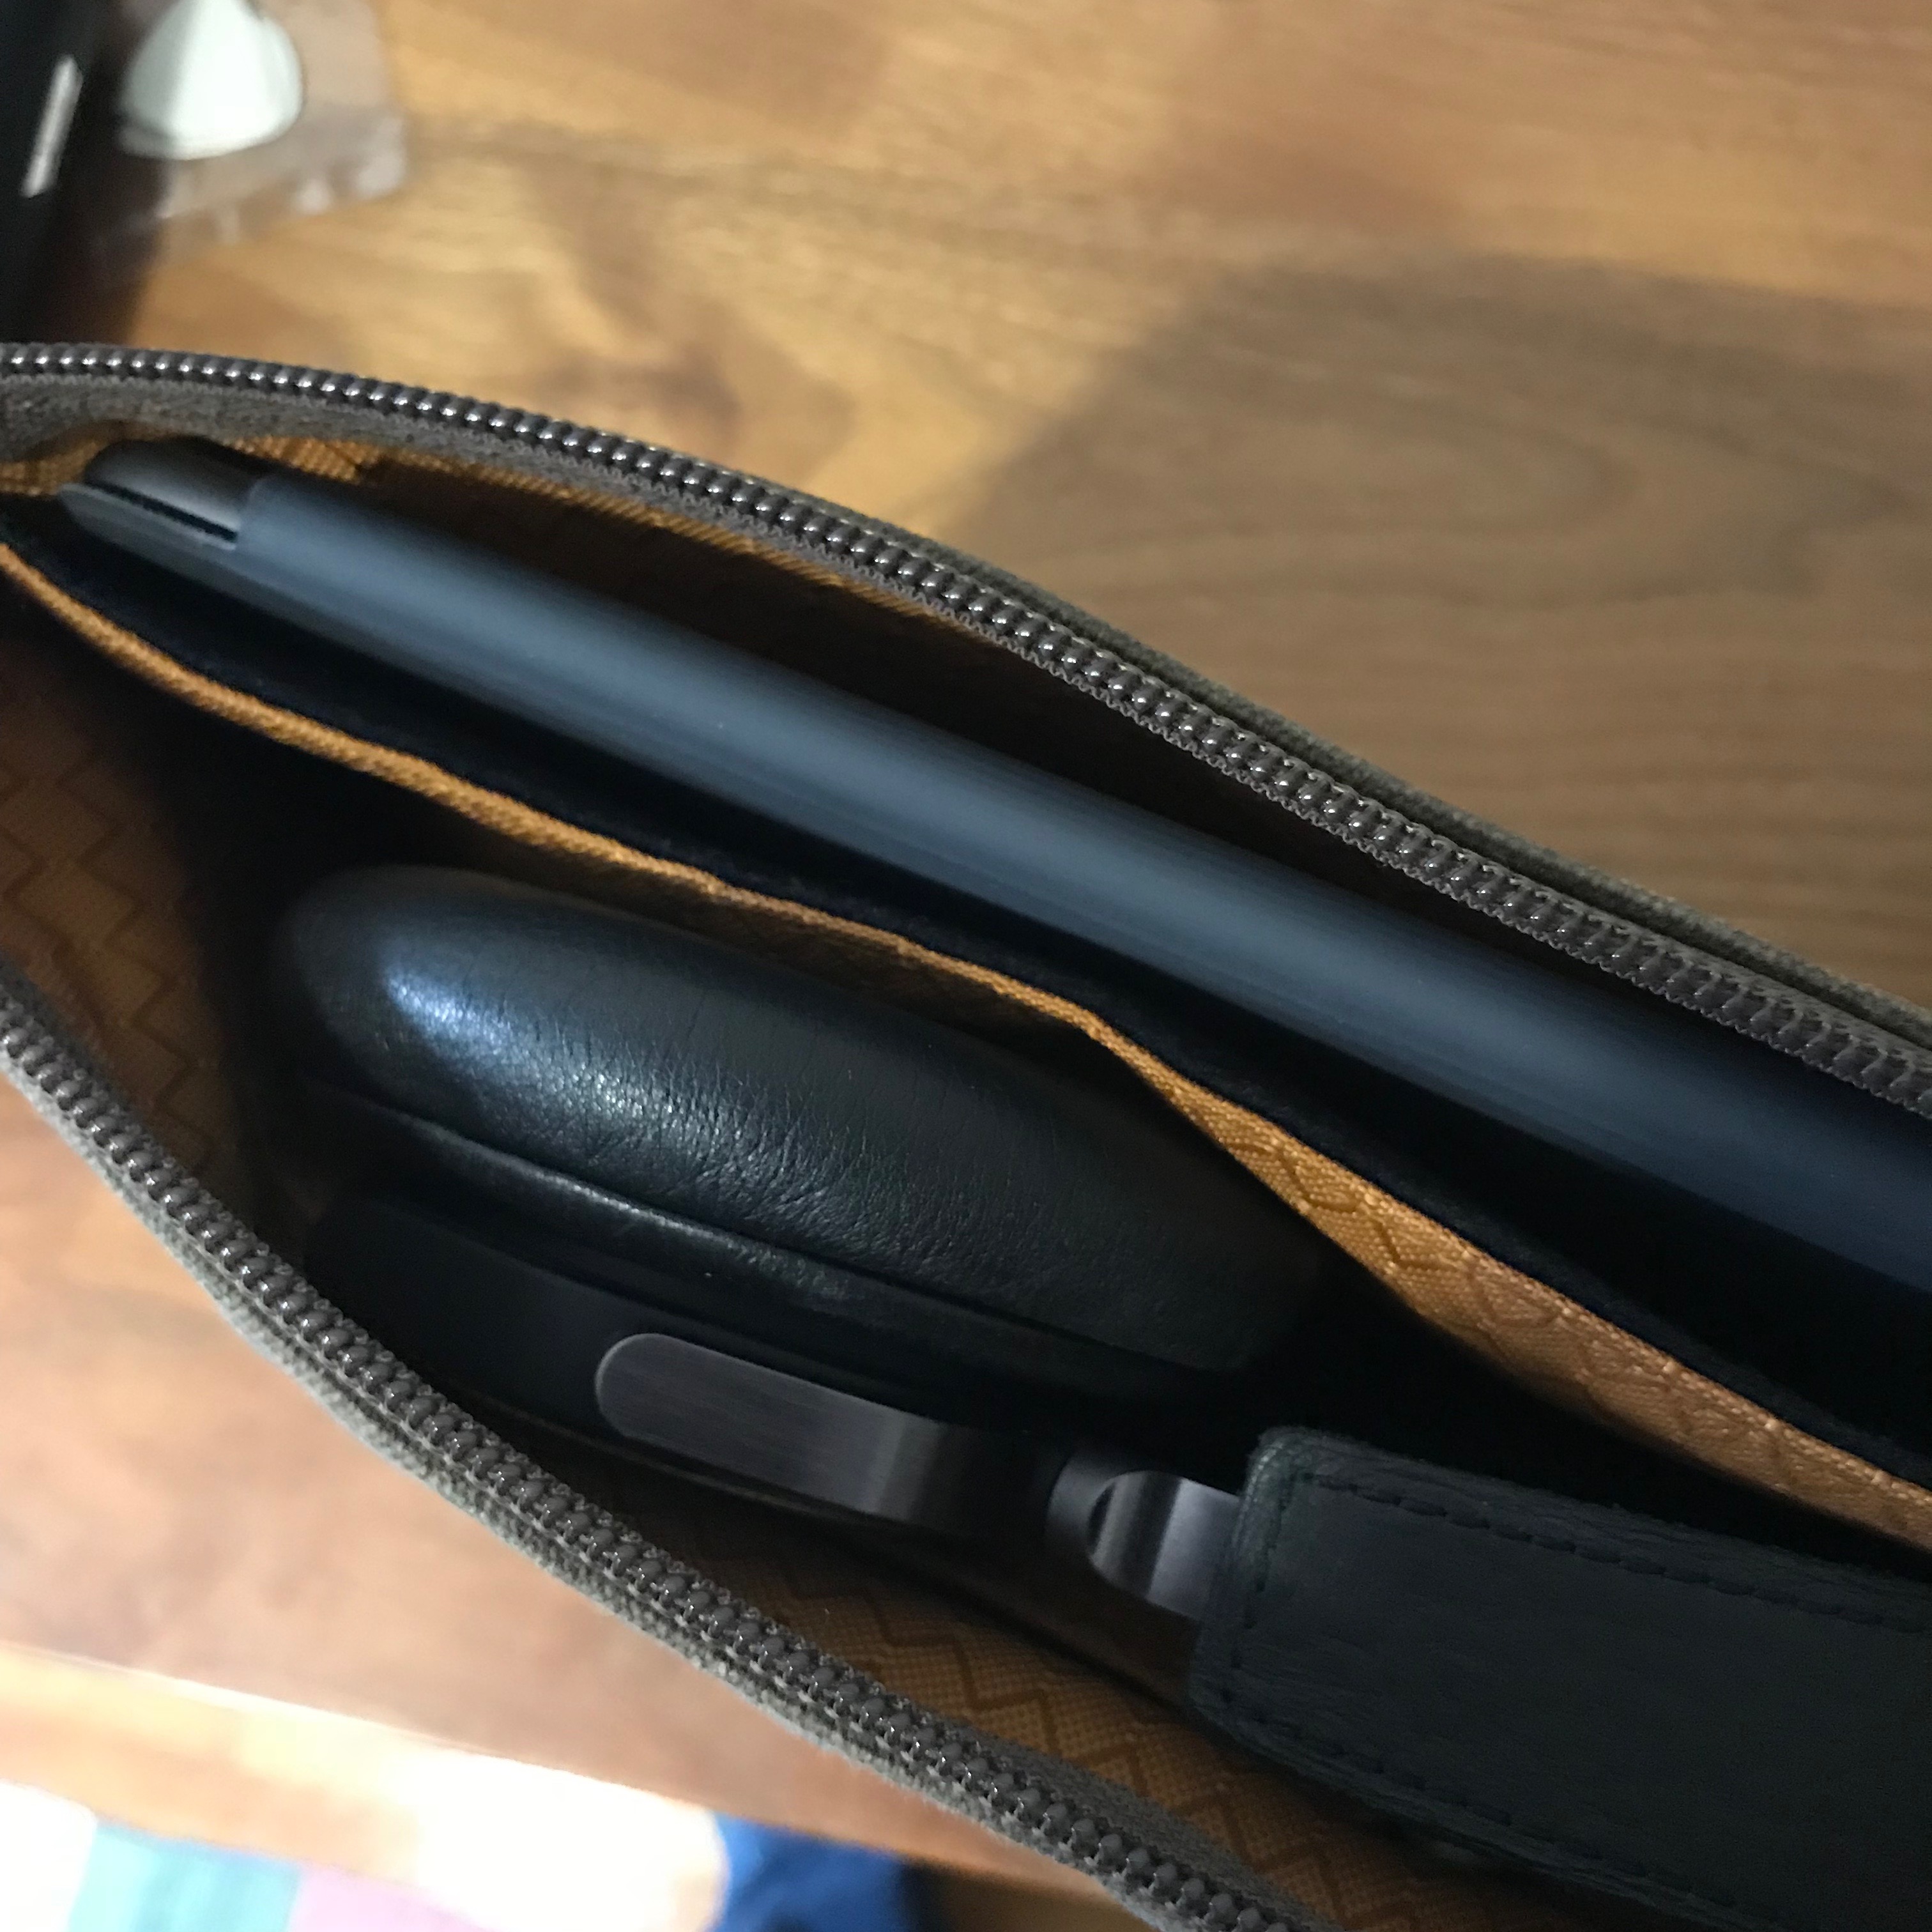
For those who are familiar with Waterfield’s excellent Gear Pouches, think of the Air Caddy as a big Gear Pouch made specifically to hold an iPad. It has a dedicated pocket for the iPad, which will hold either a 9.7-inch or a 10.5-inch Pro, with or without a Smart Cover. But it also has two more internal pockets, where I like to keep my Apple Pencil, my headphone dongle, the little adapter that lets you plug an Apple Pencil into a regular lighting cable, and so on. And it also has an additional side zipper pouch with two more pockets, for more cables, pill boxes, a snack, etc. I can also just barely stuff my B&O H6 headphones inside the main compartment of the Air Caddy. Which means everything I need for the plane comes out of the Air Porter with one simple lift of the main flap.
Once out of the Air Porter, the Air Caddy slips nicely inside the seat pocket in front of you. So you can grab your Air Caddy, toss it into the front seat pocket, then wait until you are settled to grab whatever gear you need during the flight. As you get closer to landing, you can pack the Air Caddy back up, toss it back into the seat pocket, and wait until you get the all-clear to pull your Air Porter back out from under the seat to toss the Caddy back in. It’s a very clever and elegant solution.
Of course, it’s not as if the other compartments of the Air Porter are out of reach during flight. With dual zippers on both main compartments of the AirPorter, pulling out your laptop, or any other gear, is quite simple as well. But for most flights, I plan on having everything I need on the plane inside this one little pouch.
The Main Compartment
The amazing thing about the Air Porter is that even after you’ve settled your laptop and iPad in, you still have an entire middle compartment for more gear. I often use this area for general stuff, like a battery charger for my iPhone, pens, business cards, and more cables. But there’s room for a lot more. On my recent trip to Chicago, I used this space to hold a Canon 5D Mark III camera body and lens. On my frequent overnight trips to Philadelphia, I plan on stuffing in a spare set of clothes and some toiletries. There’s also a key fob you can use to hook on your keys, so you don’t lose track of them.
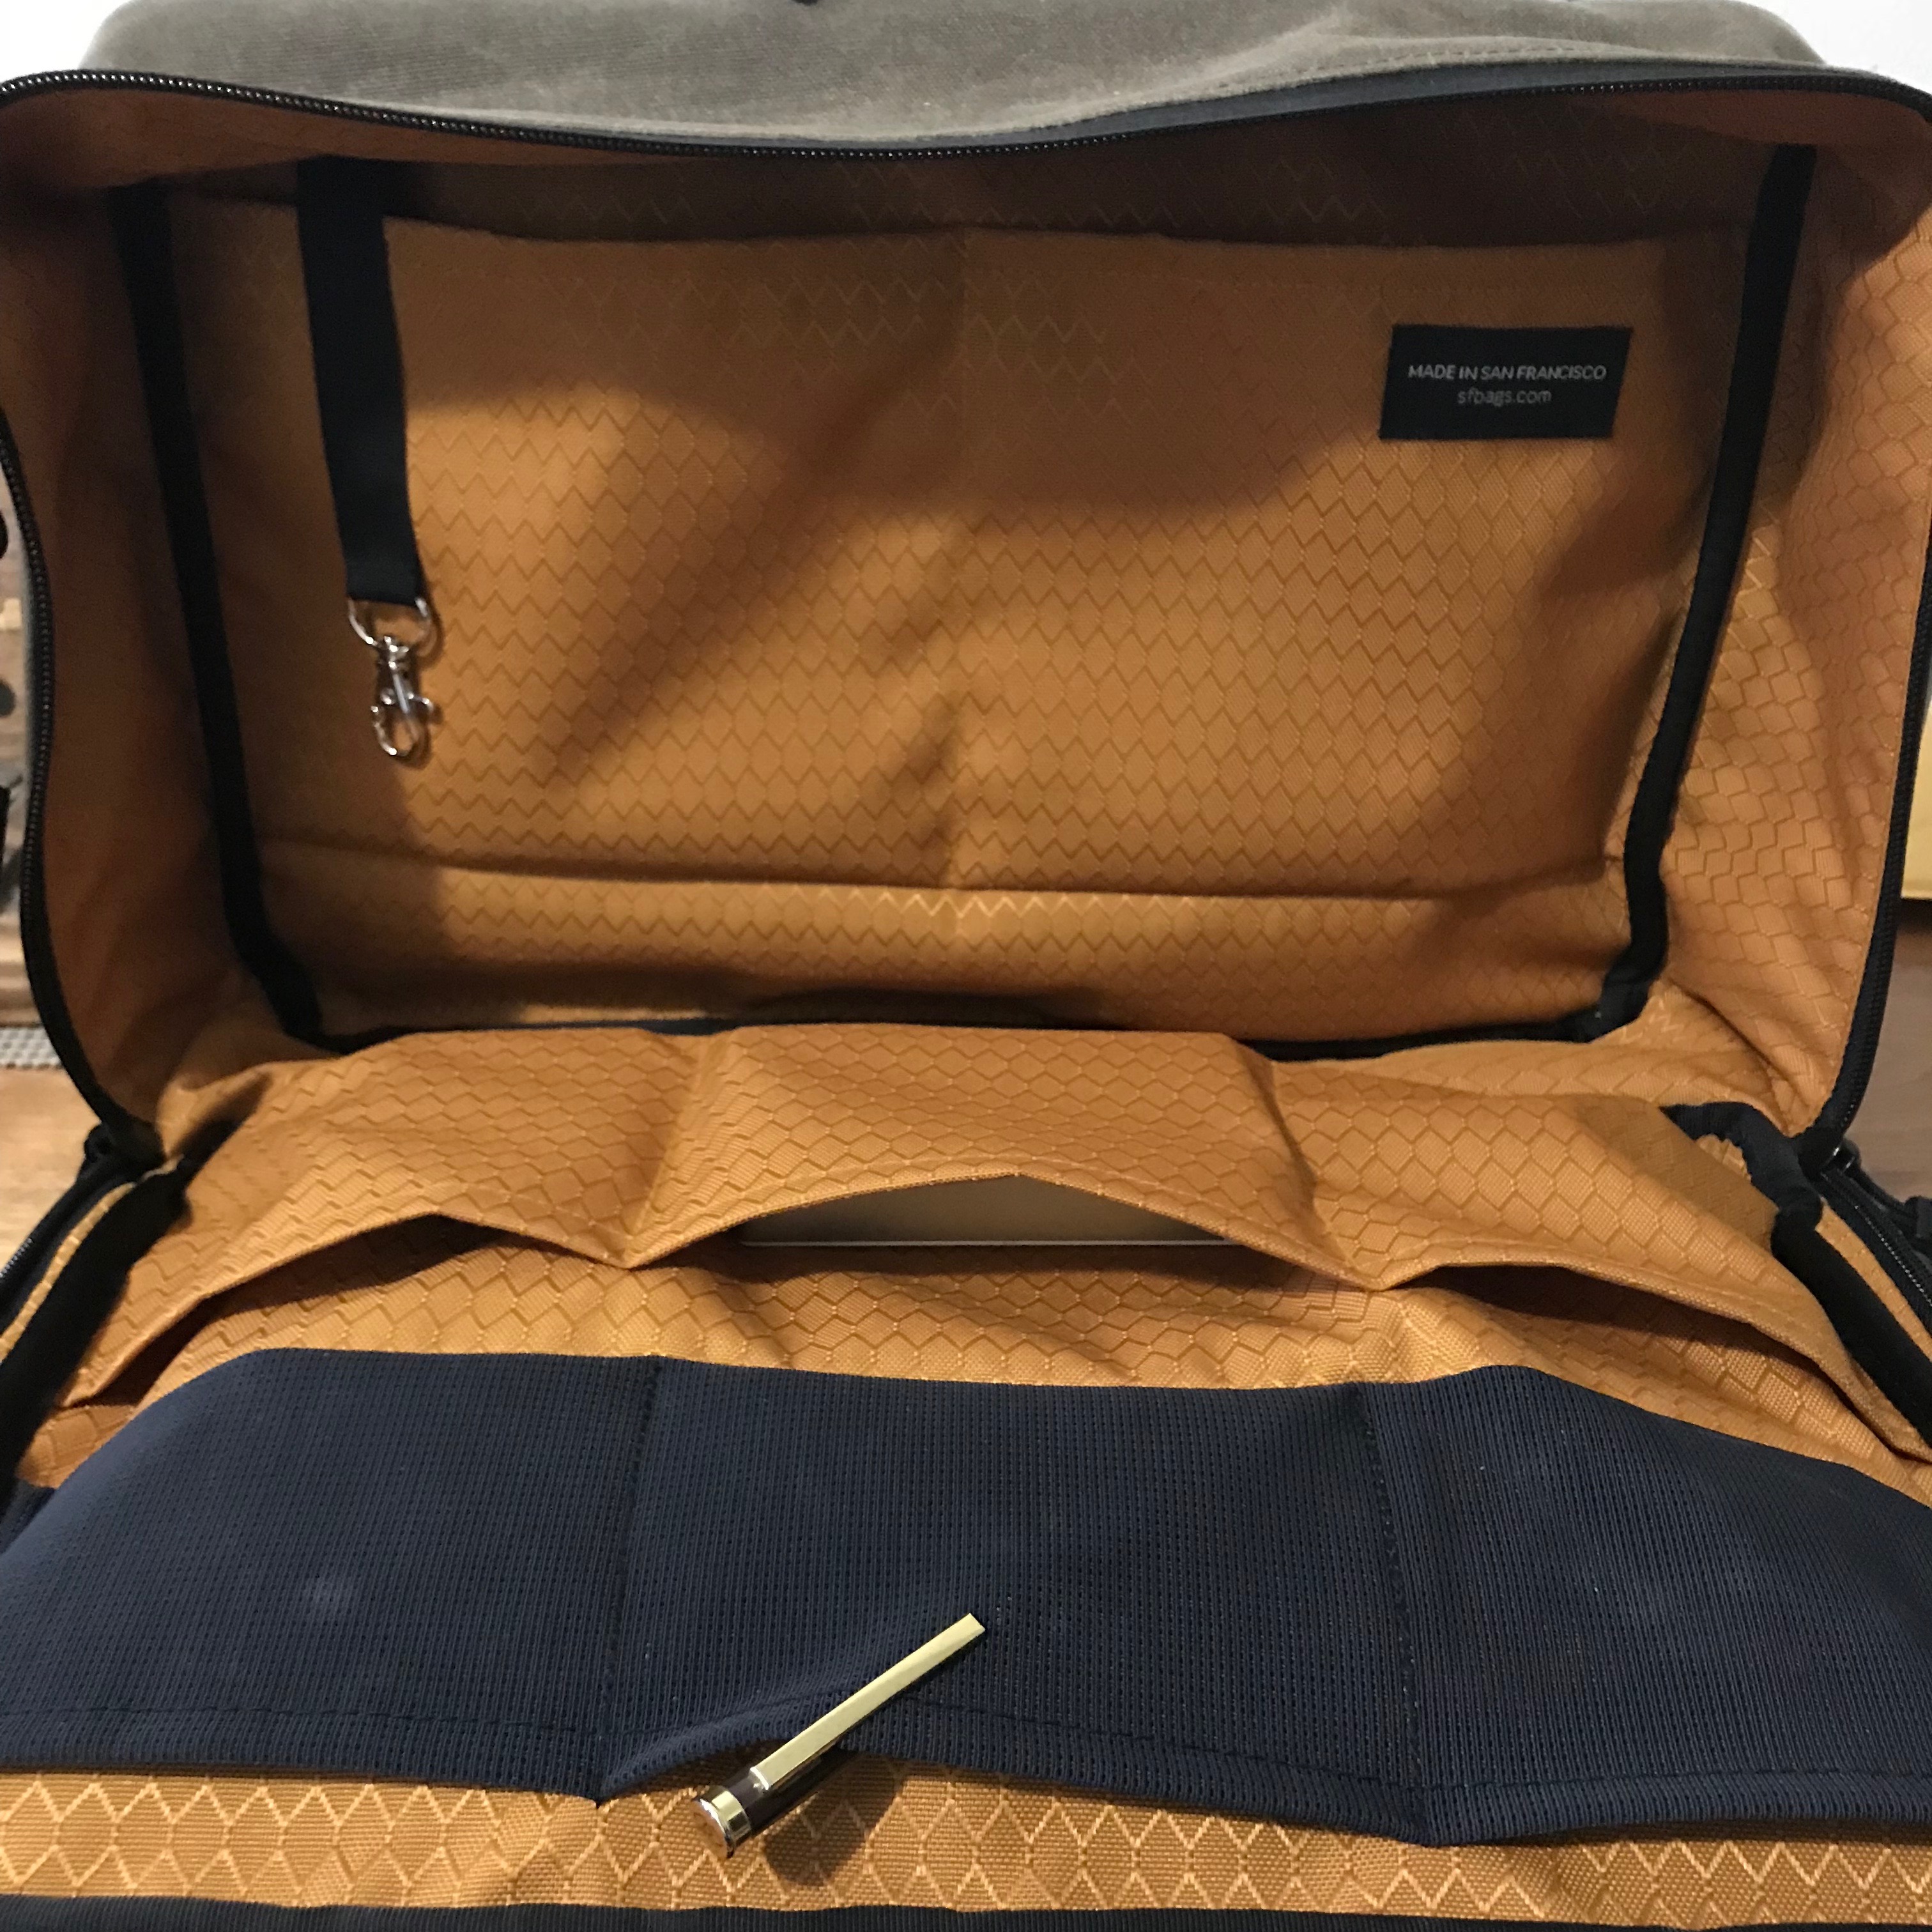
The Air Porter is not a duffle bag. And it’s not going to replace your suitcase for anything longer than an overnight trip. But it is good to know that you can store a lot more gear in the Air Porter than in most other laptop bags.
Water Bottle Pockets
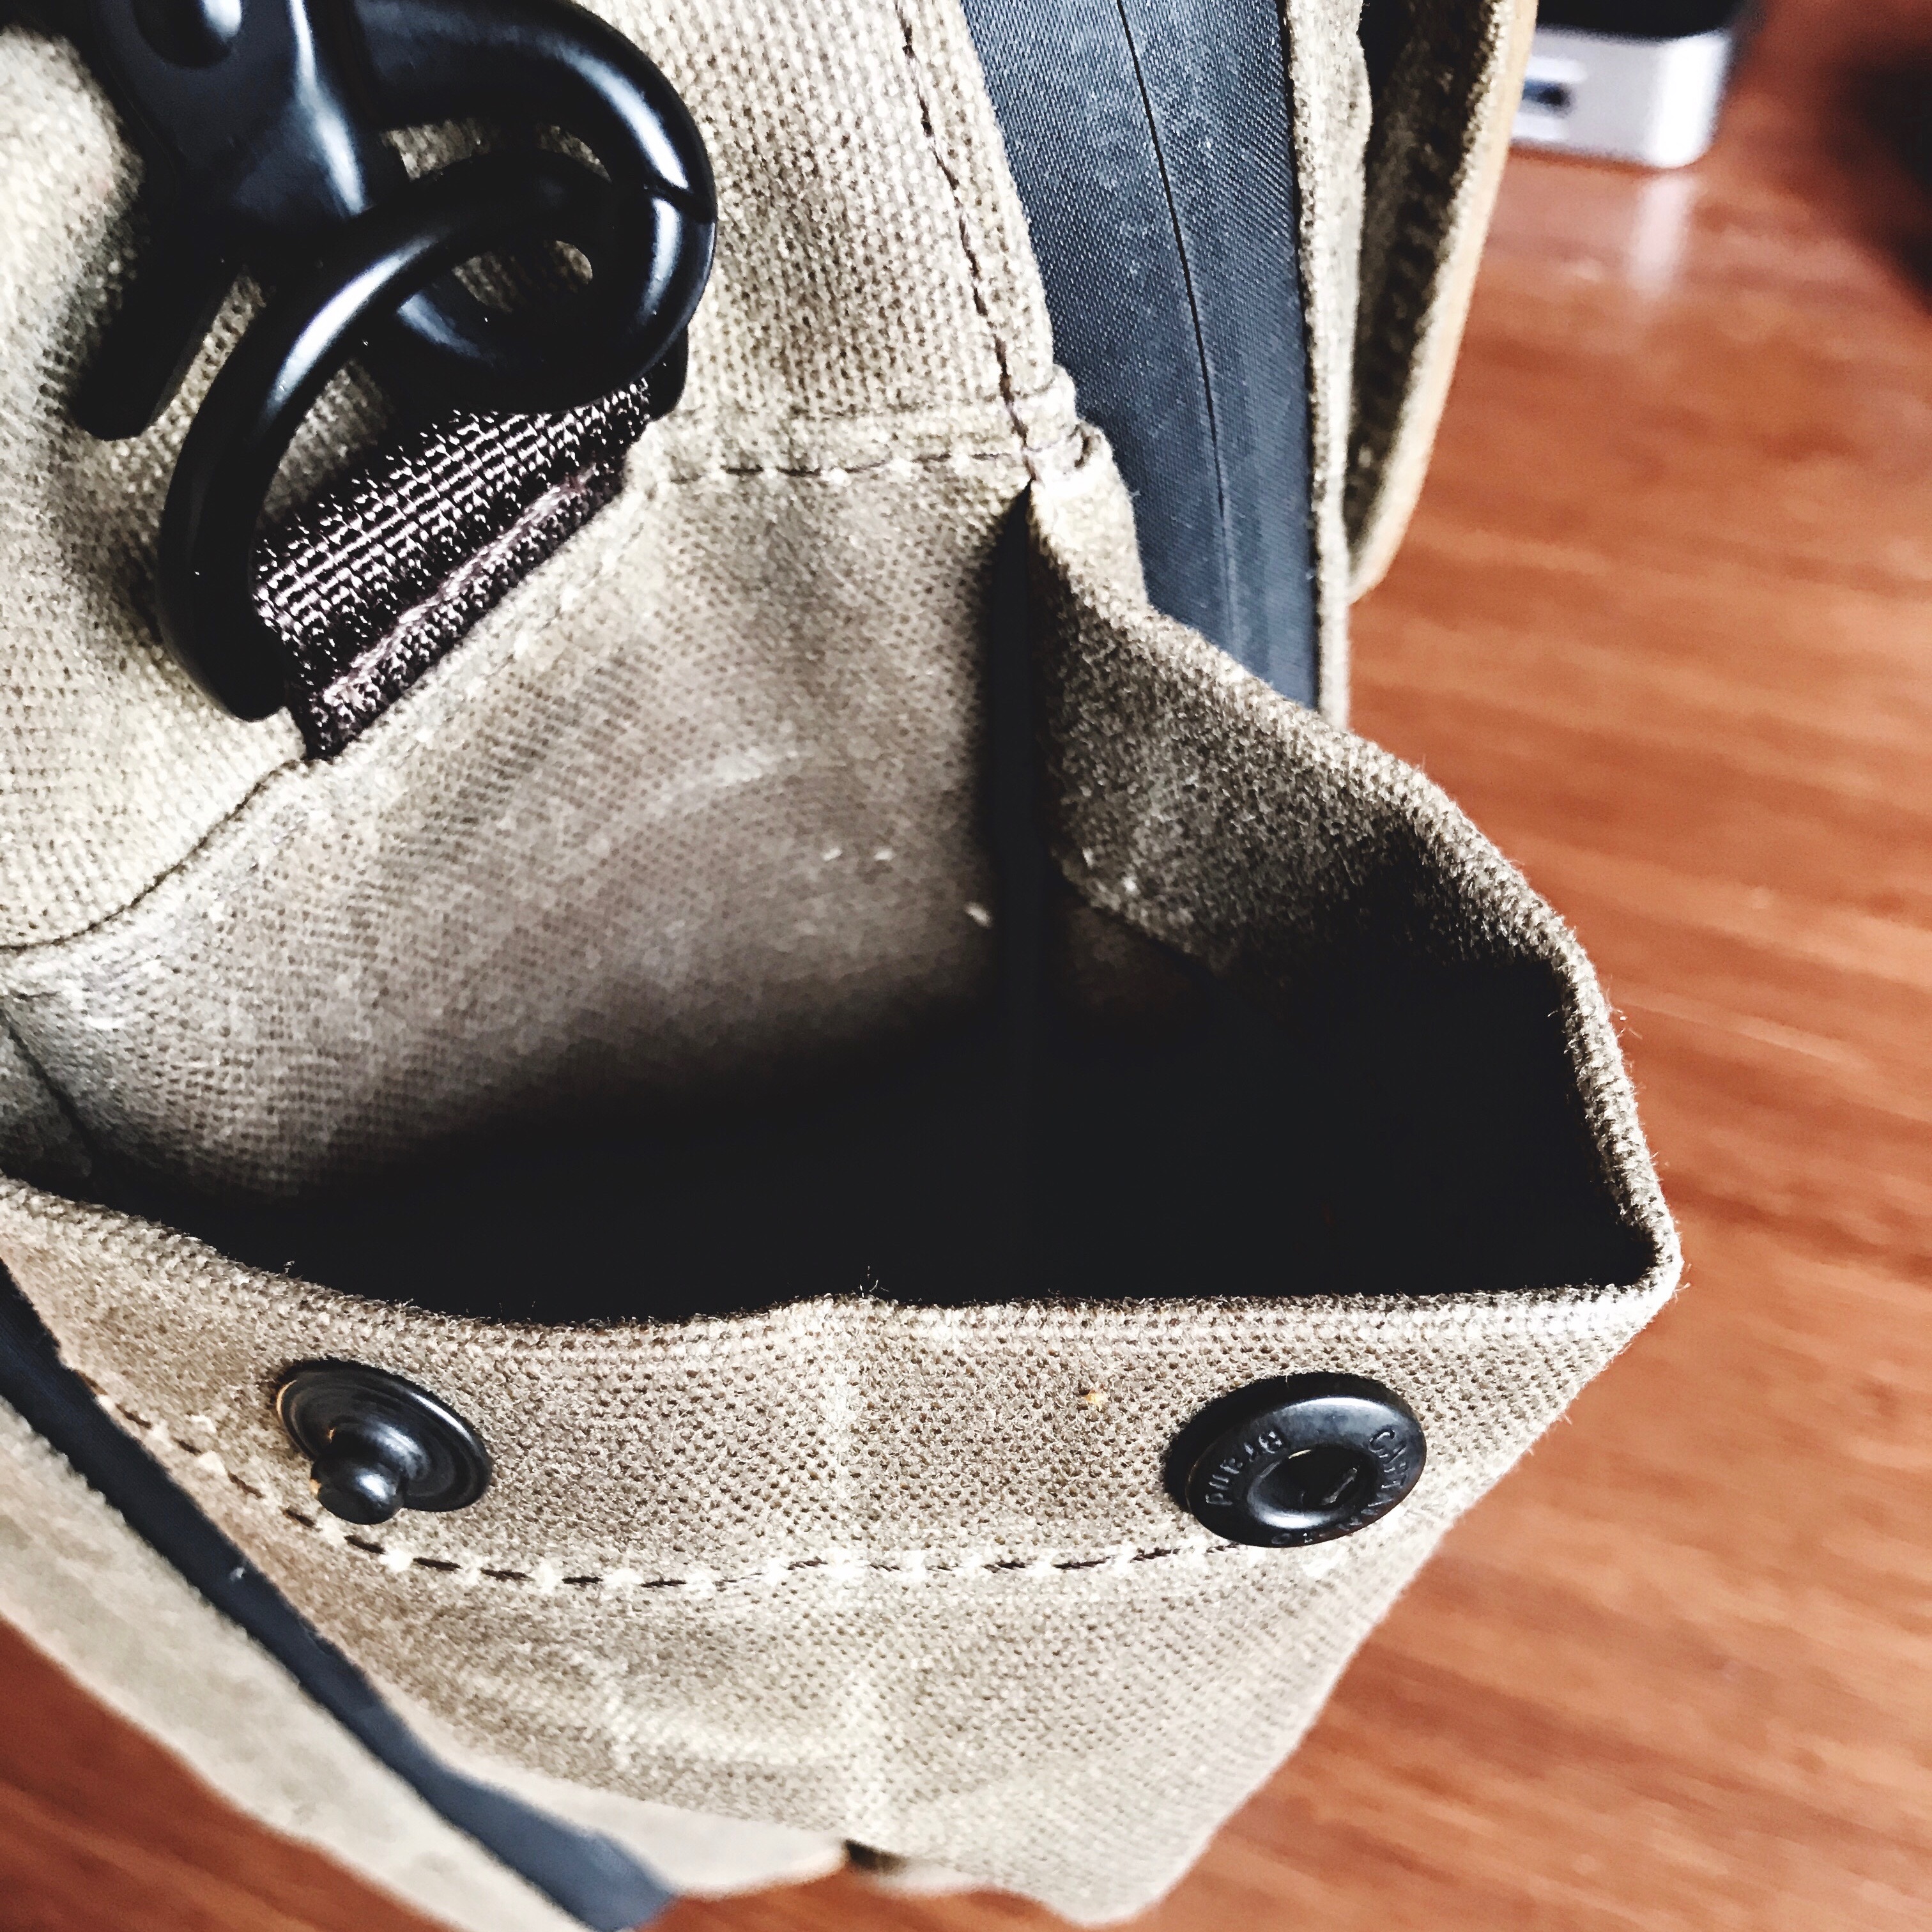
This is a nice little detail I didn’t even consider when Waterfield was asking for feedback on the Air Porter’s design. But I’m glad someone else did. On either side of the Air Porter are pockets big enough to hold a water bottle. I generally don’t carry around water bottles all day, but on the occasions I do, these will come in handy.
More importantly, the pockets also end up being pretty good for holding a folded umbrella. My gigantic Davek Duet looks a little silly sticking up out of the side of the bag, but it’s secure in there. Regular-sized umbrellas for regular humans should fit even better.
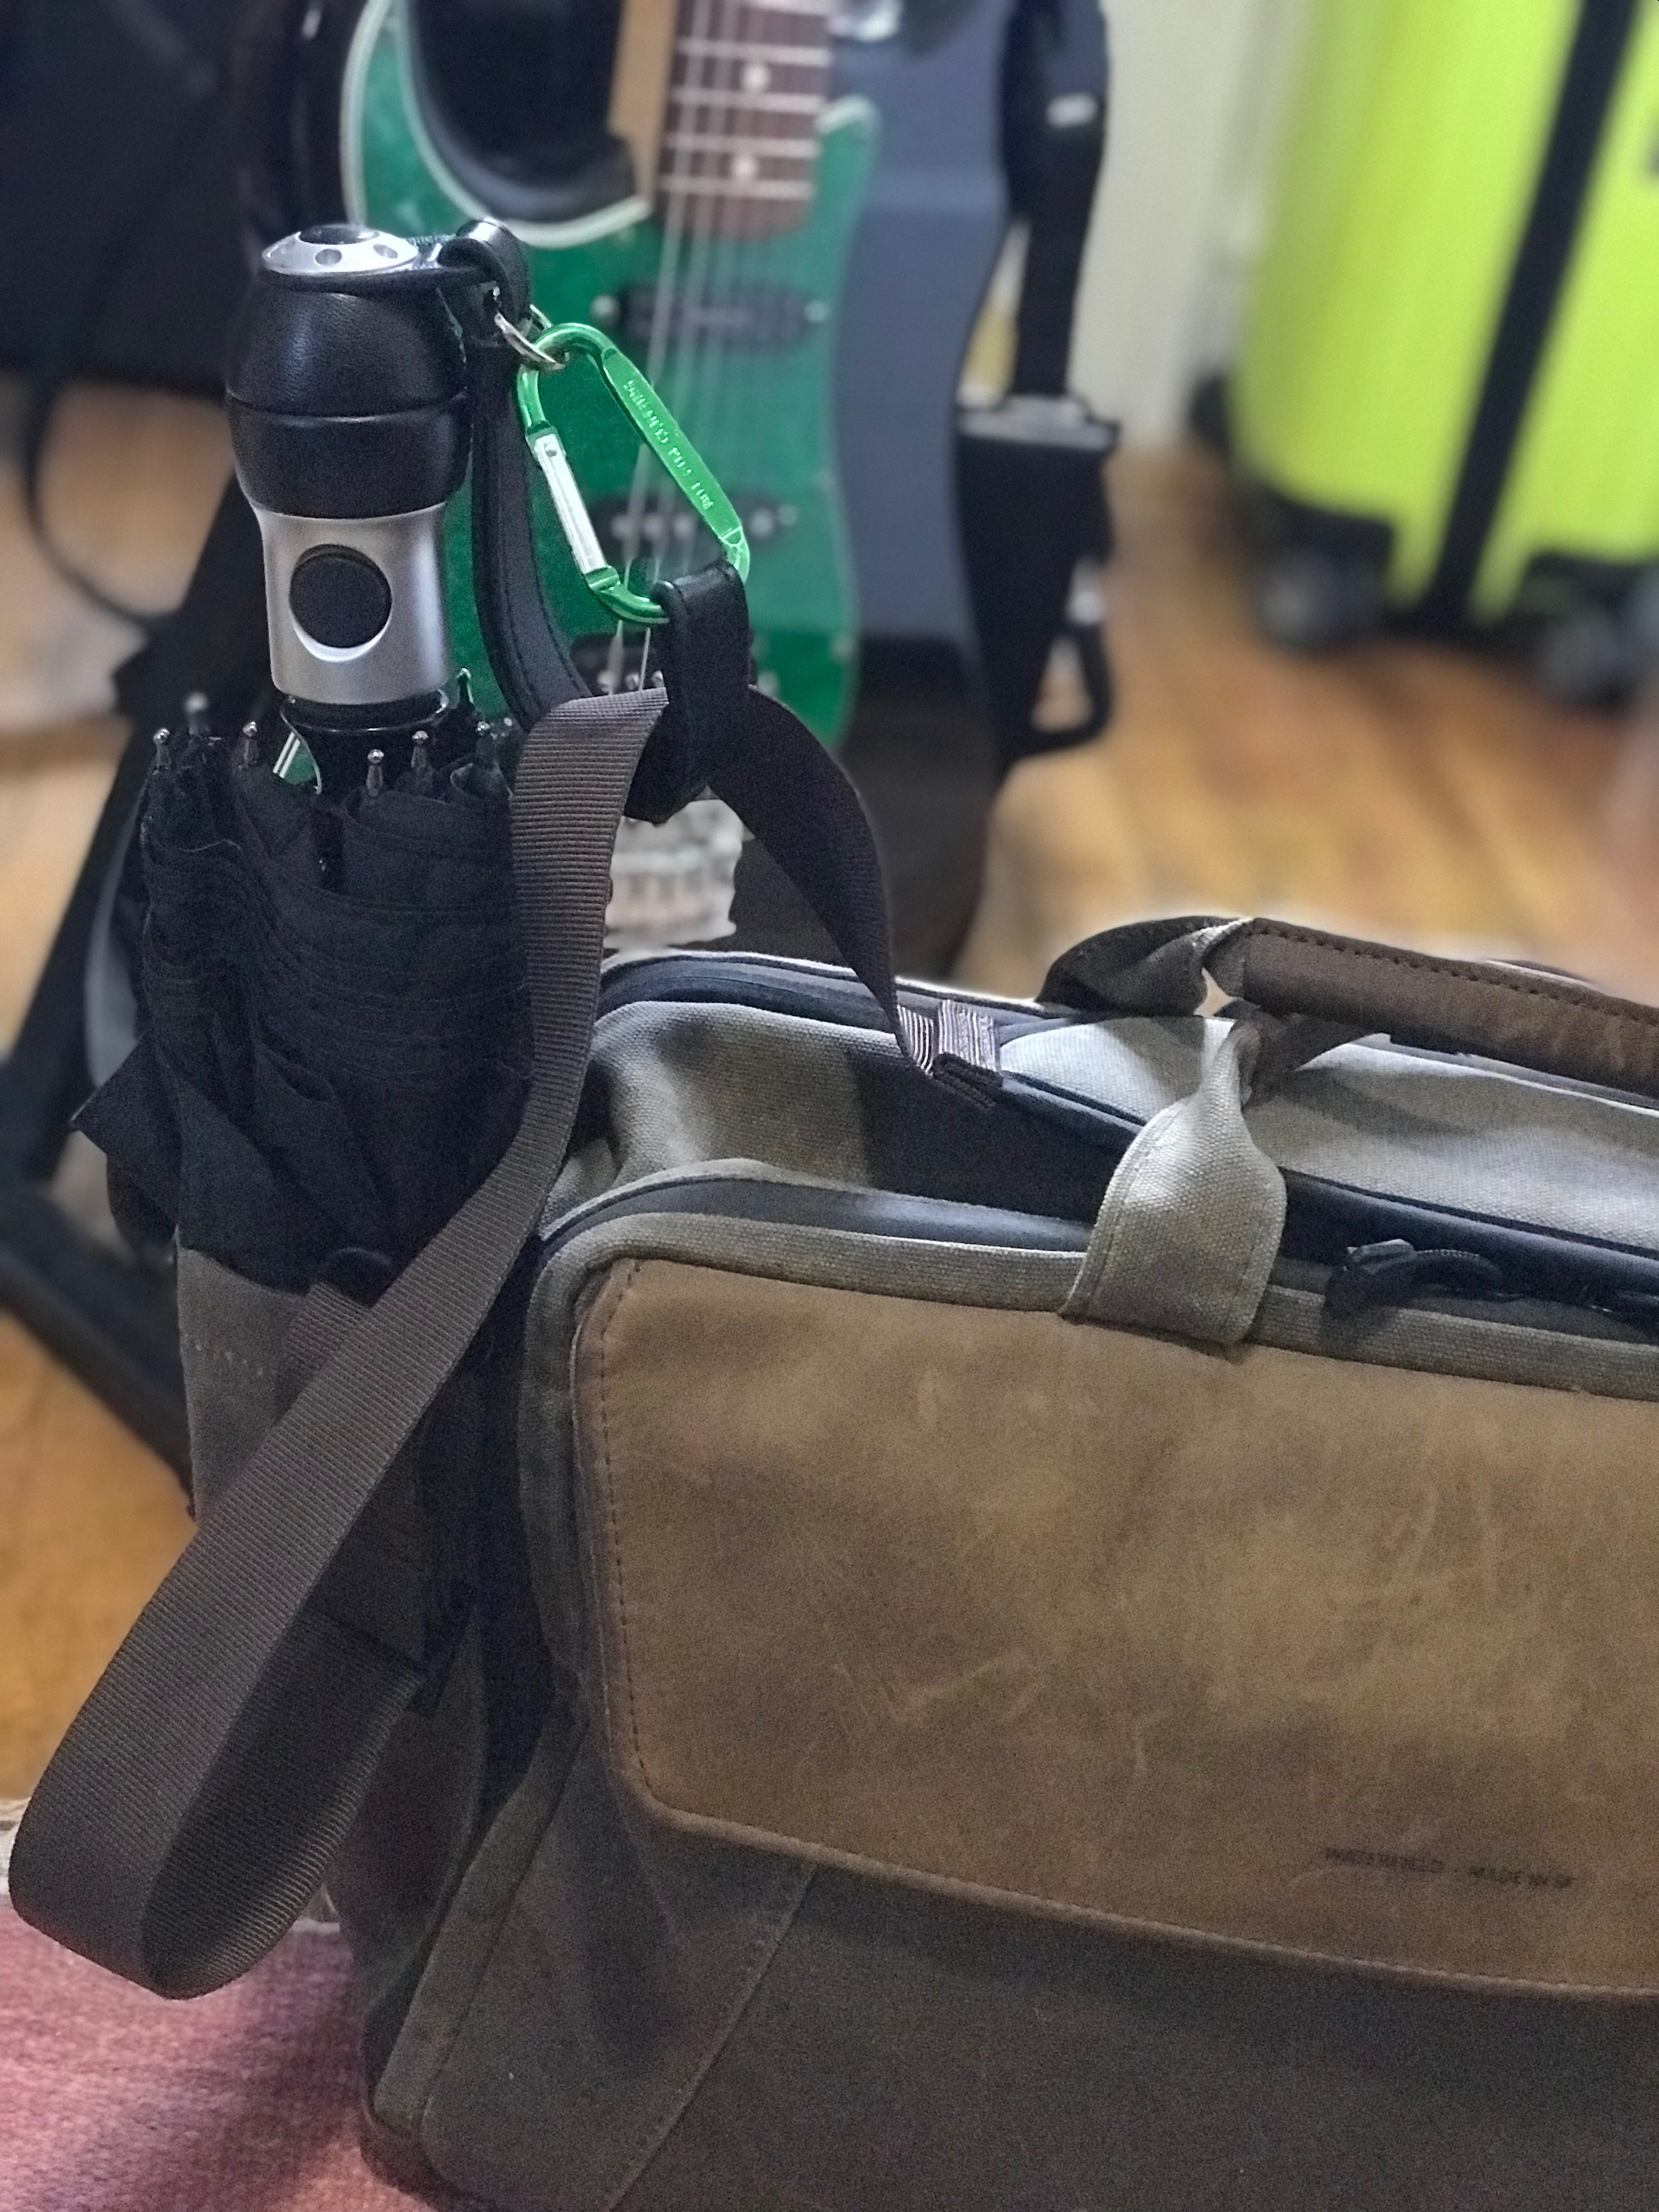
As often as it rains here in New York. I appreciate having somewhere to store my umbrella when it’s not in use.
The pockets fold into themselves and can be buttoned up when you don’t need them. So you don’t have these giant openings on either side all the time. It’s another example of great execution by Waterfield.
Materials
Air Porter is currently available in two different base materials. A black ballistic nylon, for a more classic, professional look, and a brown waxed canvas, for those of us who are tired of all-black bags. Either one includes matching leather for the front flap, as well as on the bottom edge trim. Compared to many other Waterfield bags, the options for accent materials are a bit limited. You can’t get a black nylon body with a chocolate leather trim, for instance. But I suspect this will change over time, as more people purchase the bag, and Waterfield examines the market further.
I own many products of Waterfield’s featuring the ballistic nylon material, including a Vertigo bag, various iPad and laptop sleeves, and some gear pouches. It’s a great material. Lightweight. Classic look. Takes a real beating.
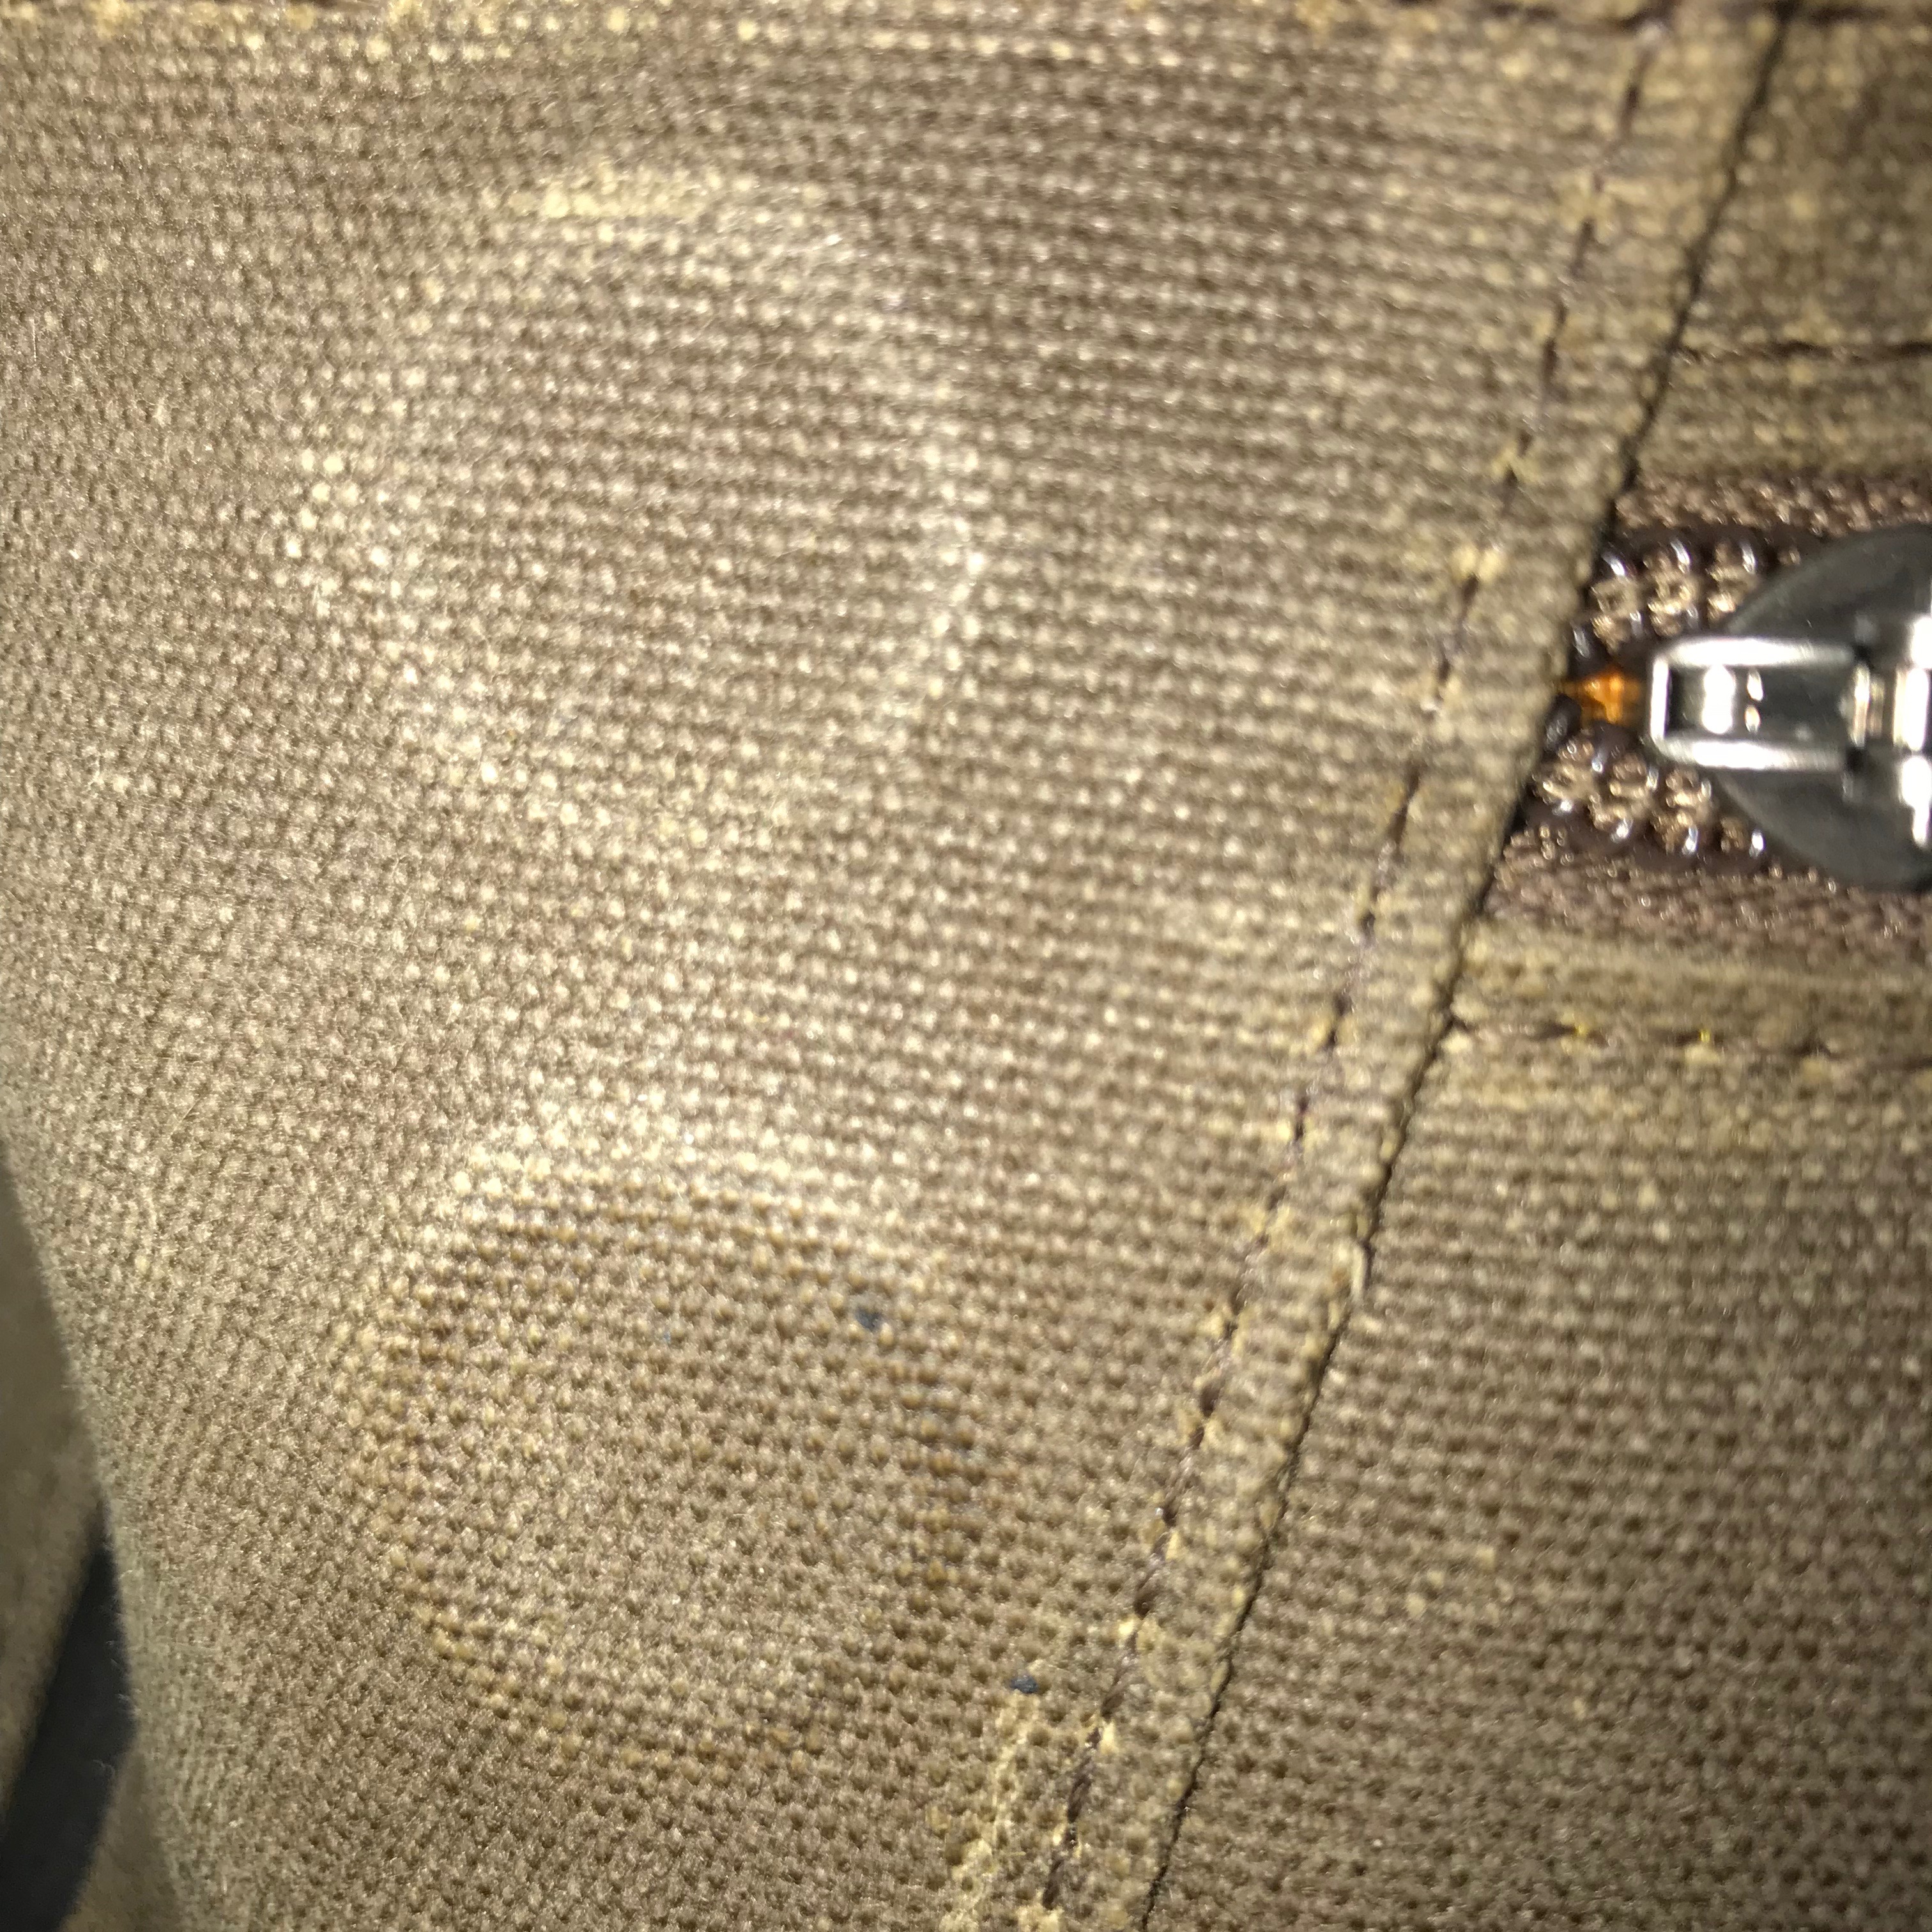
I chose the waxed canvas this time because I prefer the look of brown bags, frankly. I feel like the lighter color shows off the Air Porter’s lines a bit better, too. Having never tried any waxed canvas bags before, I wasn’t sure what to expect. So far, I’m very pleased. The canvas seems as if it will be as durable as the nylon, but with more character, as it develops lines and marks over time, much like a brown leather develops a “patina.” It has a well-worn look that’s very fashionable and hides the bag’s age, both when it’s brand new as well as when it’s several years old. I suspect this bag will age very well.

At the same time, the waxed canvas still feels professional. I would not feel strange wearing this bag over my shoulder with a suit. Yet it still looks great with my jeans and tennis shoes.
Another nice touch I want to point out is the splash-proof guarding trim around all the outer zippers. The Air Porter features a black lining over all exposed zippers, to protect the zippers from getting wet. It’s a nice clean look. The black lines offer a nice accent to the brown waxed canvas as well, I think.
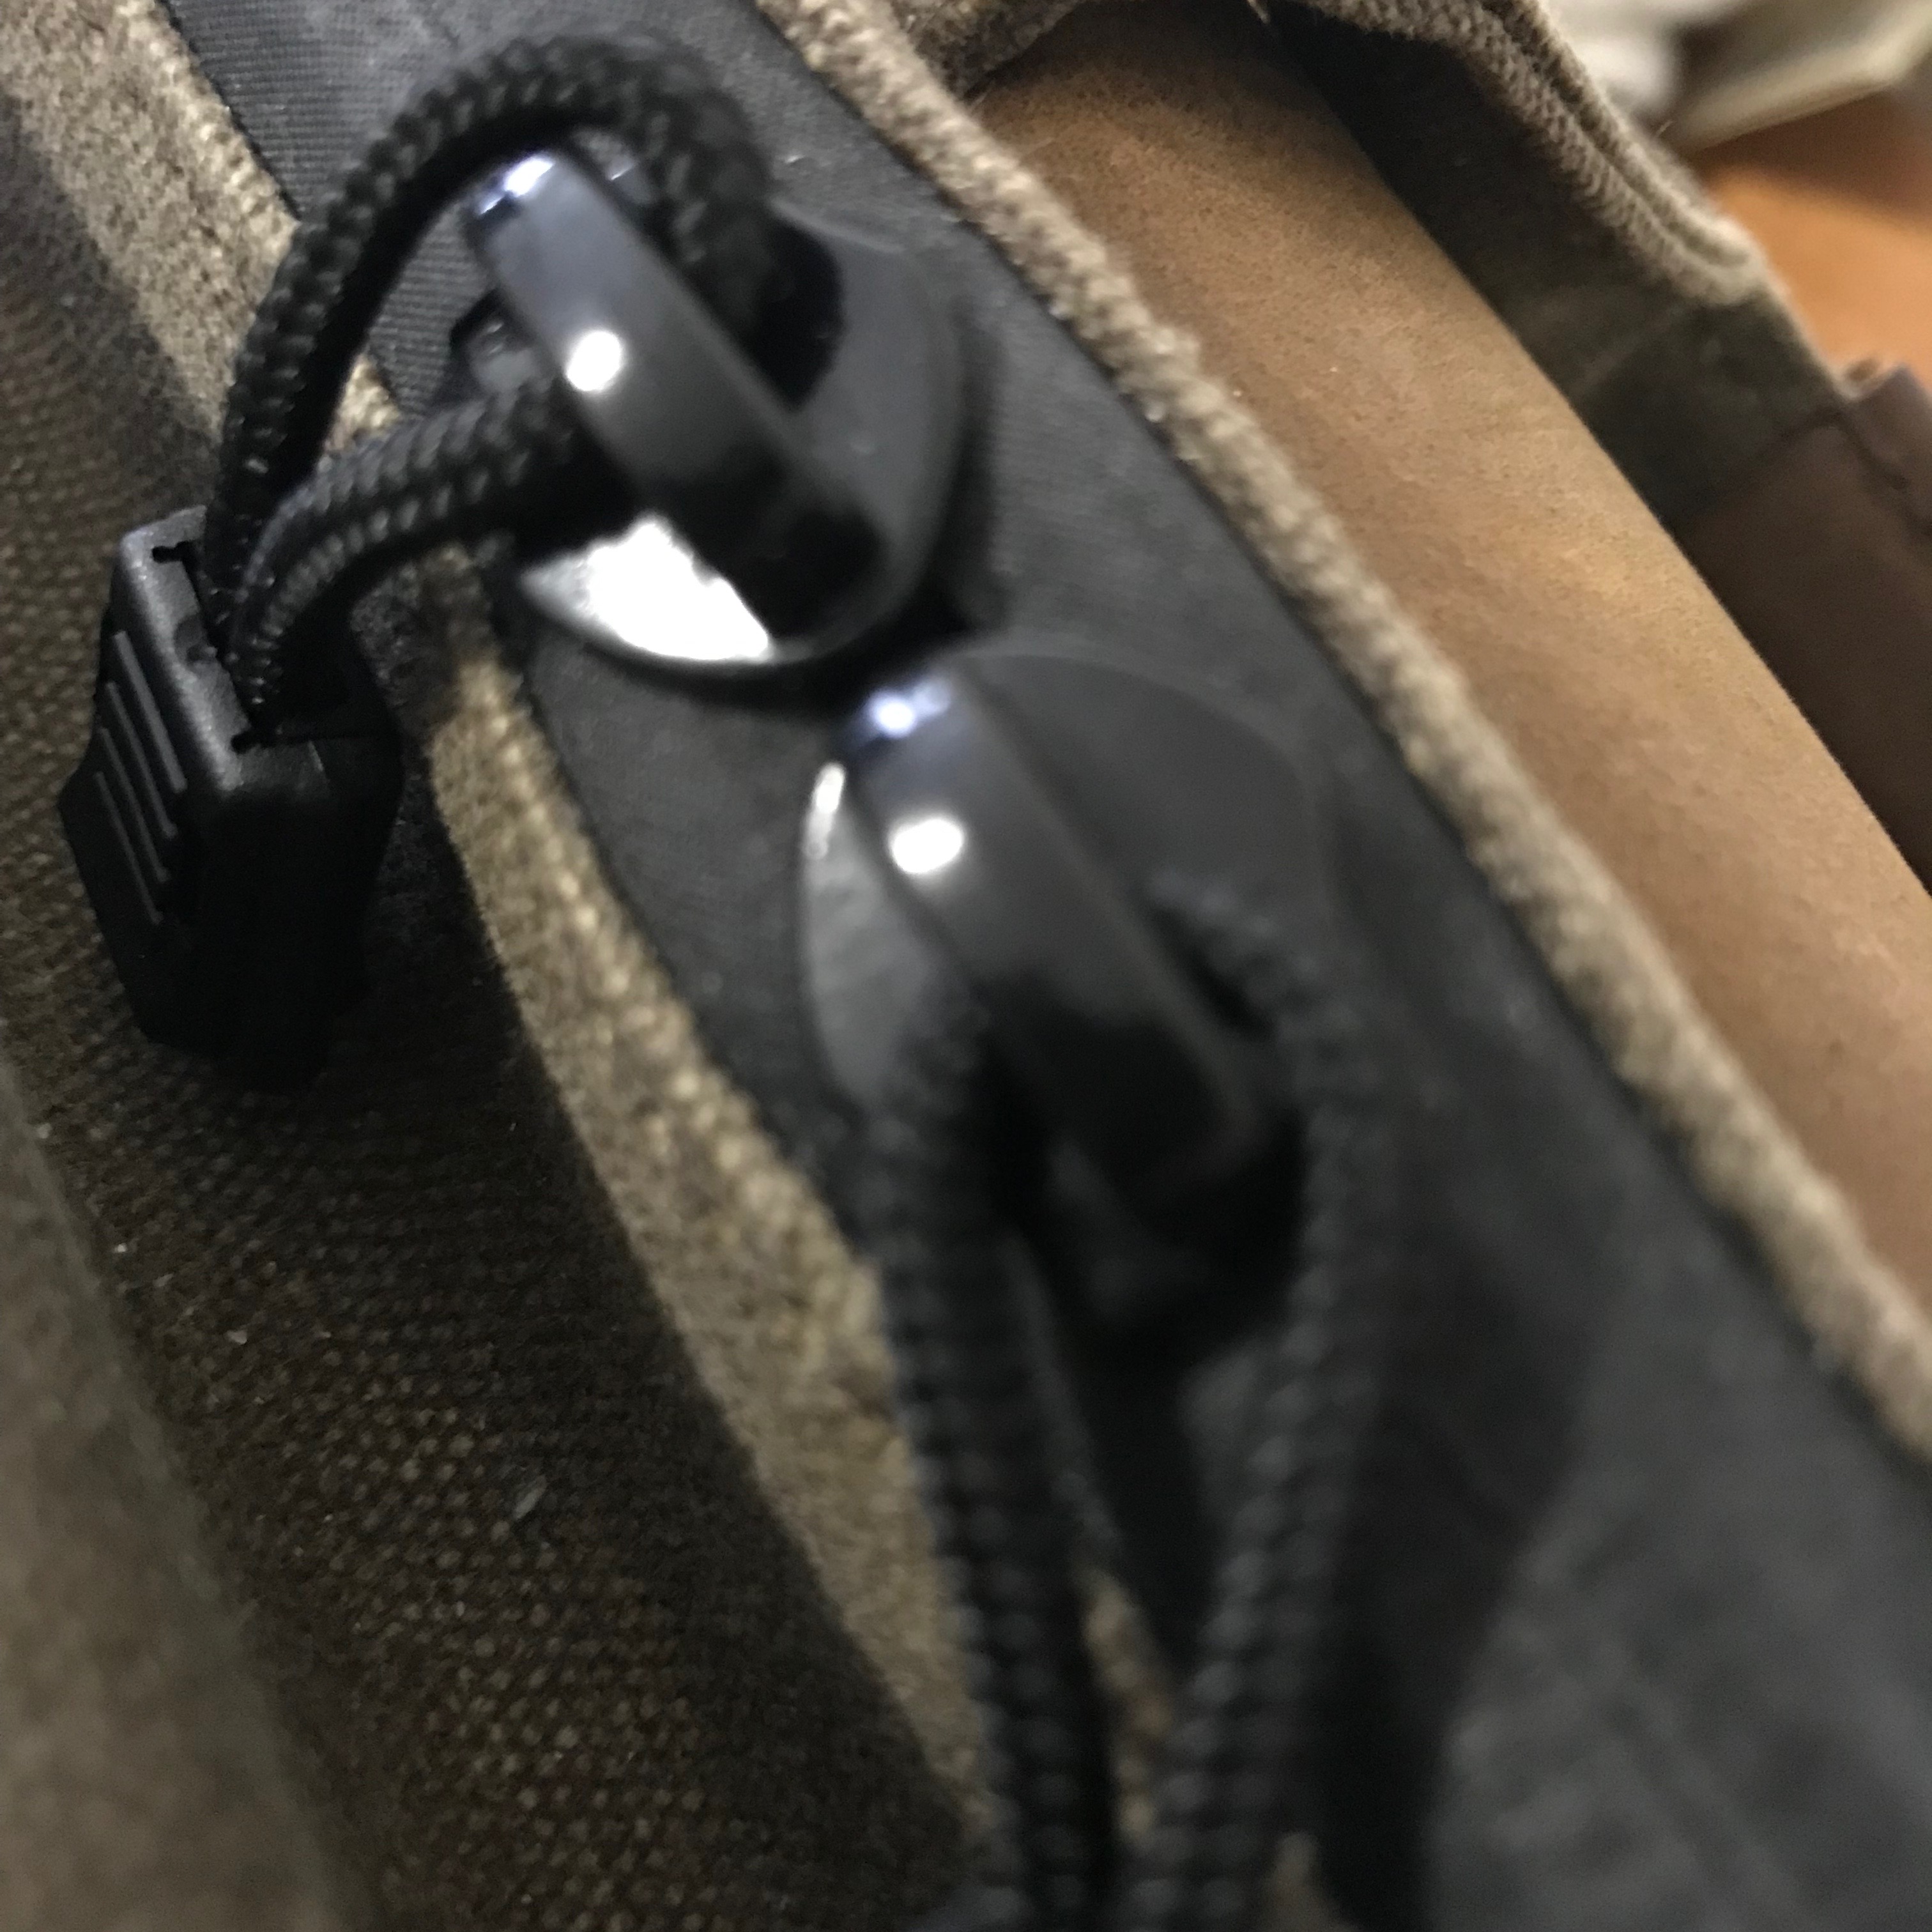
The waxed canvas is also water resistant, so there’s little need to worry about getting caught in the rain. Even the leather flap is likely to take on water with no trouble. If my Muzetto bag—which has been caught in more rainstorms than I care to remember—is any indication, the Air Porter should do just fine in foul weather, while keeping its contents dry at the same time.
And last but not least on the materials front, I have to mention the excellent bright gold inner lining of the Air Porter. This material has been a feature of Waterfield bags for as long as I can remember. And it always serves its purpose: to make everything inside the bag easier to see. Nothing worse than digging around through a bag looking for stuff, and the inside is completely dark. Especially since tech gear is so often black. The gold really makes it a breeze to locate whatever it is you are trying to find.
Weight
At 2.4 lbs, the Air Porter is rather light. At least for a bag in this class. This is important when traveling, as the last thing you want to do is add unnecessary weight to your traveling gear. The Air Porter is not as light as a smaller Muzetto bag, of course, but it carries quite a bit more gear and has a rigid structure. Given those constraints, I think the Air Porter does very well in this regard.
Also important for the Air Porter is how well it distributes weight. I was a bit concerned switching to a horizontal bag after many years of using vertical messenger-type bags, where the weight is distributed over a shorter horizontal plane. But the placement of the D-rings on the shoulder strap allows the Air Porter to lie pretty flat against your body, whether over the shoulder or on the shoulder. And with the laptop in back and the iPad in front being carried inside the Air Caddy, the horizontal weight is fairly balanced as well. The bag doesn’t feel like it wants to tip over, either on my wheeled-suitcase or on the floor. This is not an easy thing to get right.
Capacity
This recent trip I made to my conference in Chicago was a good stress test for the Air Porter. But it is probably not representative of how I will normally travel with it.
For my flight, I had the following gear stuffed into my Air Porter all at once:
- 13-inch MacBook Pro
- 11-inch MacBook Air
- 10.5-inch iPad Pro
- Canon 5D Mark III camera with 50mm lens
- Mophie Juice Pack battery charger for iPhone
- a backup hard drive and cable
- two laptop power adapters and cables
- a spare battery for the camera
- B&O H6 headphones
- Apple Pencil
- several additional cables and adapters
Yes, I really did need to bring two laptops on this trip. Fortunately, with the 13-inch Pro in its sleeve, the MacBook Air still had plenty of room to slide into the back compartment, freeing up the center compartment for the camera and its accessories.
I think at one point, I even stuffed my hand coffee grinder into the Air Porter. But that was only briefly, from the conference venue back to my hotel.
With all of this gear in tow, the Air Porter still looked great. It held its shape despite being filled to the brim. It was heavy to carry on my shoulder, so I wouldn’t recommend this much gear for daily use. But since I was hauling it around on top of my Rimowa suitcase for most of the time, it was actually surprisingly workable.
The point is, compared to the Muzetto, which was designed to limit the gear you travel around with on purpose day-to-day, the Air Porter can handle much larger capacities. And that’s important for those many trips where being a minimalist isn’t an option. This is a far more versatile bag than anything I’ve owned thus far.
Use
So how do I plan on using my Air Porter? After all, I still have my excellent Muzetto bag for light day-to-day use, and my Vertigo for those days where I need to carry a bit more.
Well, for flights, it’s no contest. I will choose the Air Porter every time. The convenience of the Air Caddy, plus the ability to stand the bag up under the seat in front of me make it the obvious choice.
For overnight bus trips to Philly, which I do about once a month, I’d also go with the Air Porter. Especially since it can double as an overnight bag—at least during the warmer months.
If I’m just headed out to the cafe, and I only need my iPad, I’ll likely pop it into my Air Caddy and drop that into the Muzetto. Or if I only need my 13-inch Pro and nothing else for a few hours, I may slip that into the Muzetto and leave the Air Porter behind.
It’s early to tell, but I think the Air Porter is going to be my goto bag more often than not. Just having the flexibility to add more gear when needed is enough to tip the scales in its favor.
Conclusion
With the Air Porter, I think Waterfield has done it again. They design great stuff and build it with care. I wish more companies followed that simple philosophy.
If you’re in the market for a travel carry-on that’s designed with a ton of thought and attention to detail, that’s made in America by people who are paid decent wages, and that will last for many years to come (I’m about to enter year 8 for my Muzetto) the Air Porter is certainly worth a look. Sure, it’s not an inexpensive bag, but considering how long it will last and how often I will be trusting it to protect my tech gear, I think it’s well worth the price and then some.
